在智算云平台开发机上部署 QAnything
QAnything 是一个开源项目,旨在提供全面的问答系统解决方案。该项目的 Github 仓库地址为:https://github.com/netease-youdao/QAnything,主分支为 qanything-v2。
基础方案
我们将使用智算云平台「开发机」的 Docker 容器功能来部署 QAnything。Docker 容器(DinD)功能,允许用户在开发机内(主容器)运行其他容器,并创建挂载 GPU 的容器,测试容器化应用,从而提供更高的灵活性和隔离性。
本方案仅用于在智算云平台 AIStudio 开发机上测试、体验 QAnything 平台,非生产级别服务部署方案。
实施障碍
在智算云平台的开发机中安装 QAnything 时,如果根据 QAnything 官方文档进行操作,可能会遇到一些障碍:
- 开发机默认未预装 Docker Compose,需要自行安装 Docker Compose。
- 由于运营商网络限制,不支持直接从 Docker Hub(
docker.io)拉取镜像(包括未指定 Registry 前缀和显式指定docker.io的命令),需要自行获取镜像。 - 使用
docker volume命令创建的卷无法持久化存储。 - 可使用 -v 挂载持久化存储,但开发机 rootfs 仅提供 100GiB,存储容量有限。建议为 QAnything 提供更大的持久化存储,例如云盘 或共享高性能存储。
- 需要手动处理文件目录权限问题。
- 不支持
--privileged模式,需要调整相关配置。 - 容器网络配置需要特别注意,以确保各服务之间的正常通信。
环境准备
创建一台开发机,要求如下:
以下教程以单卡 A100 开发机 + 云盘 为例。如果您的租户拥有共享高性能存储,建议使用单卡 4090 机型。
安装 Docker Compose
验证 Docker Compose 是否已安装。
docker compose version如已安装,将正常输出版本号。如未安装 Docker Compose,请移步自行安装 Docker Compose。
拉取 QAnything 项目代码
使用 GitHub 加速服务拉取 QAnything GitHub 代码仓库:
# 假设使用云盘,进入云盘的默认目录
# 如使用共享高性能存储,请替换为 /mnt/public
cd /datadisk
# 拉取 QAnything 代码仓库
git clone https://ghfast.top/https://github.com/netease-youdao/QAnything.git如遇到问题,可尝试替换为其他加速服务。详见第三方学术加速服务指南。
提前拉取 Docker 镜像
QAnything 原始 Docker Compose 文件中定义了多个服务,使用了 Docker Hub 镜像。由于运营商网络原因,直接从 Docker Hub(docker.io)拉取镜像时会下载失败(包括未指定 Registry 前缀和显式指定 docker.io 或 registry-1.docker.io 的命令)。
智算云平台不提供官方镜像加速服务,强烈建议您提前拉取服务镜像,保存到租户私有仓库。
- 推荐方式:使用第三方镜像加速服务,拉取 amd64 架构的镜像到本地,推送到租户镜像仓库。请参考迁移外部镜像。
- 或直接在 Compose 文件使用第三方镜像加速服务,例如直接在 Compose 文件中采用增加前缀的方式拉取镜像。
警告
请自行解决镜像问题,否则无法继续执行后续步骤。
创建目录和设置权限
首先,我们需要创建必要的目录并设置适当的权限。本教程中假设使用云盘,如使用共享高性能存储,请替换下文所有 /datadisk 为 /mnt/public。
# 假设使用云盘
# 如使用共享高性能存储,请替换所有 /datadisk 为 /mnt/public
cd /datadisk/QAnything
# 此处根据 QAnything 项目要求创建子目录
sudo mkdir -p /datadisk/QAnything/volumes/{es/data,etcd,minio,milvus,mysql}
# 赋予 777 权限
sudo chmod -R 777 /datadisk/QAnything
为 Elasticsearch 设置正确的目录权限:
sudo chown -R 1000:1000 /datadisk/QAnything/third_party/es/plugins
sudo chown -R 1000:1000 /datadisk/QAnything/volumes/es/data
为 MySQL 服务设置正确的目录权限:
sudo chown -R 999:999 /datadisk/QAnything/volumes/mysql修改 Docker Compose 文件
由于开发机的「Docker 容器」功能有一定限制,如果您直接执行项目中的 Compose 文件,将会无法运行。因此需要修改 QAnything 项目中的 Compose 文件。
注意
以下 Compose 文件中并未直接拉取 Dock Hub 镜像,而是改为了拉取租户私有镜像仓库的镜像。请务必根据您的实际情况调整镜像地址。
# 复制原 docker-compose-linux.yaml 为 docker-compose-linux-infini.yaml
services:
  elasticsearch:
    container_name: es-container-local
    image: cr.infini-ai.com/te-c7va2fg6uawxdzkf/elasticsearch:8.13.2 # 修改为私有仓库镜像
    user: root # 修改用户为 root 以便设置权限
    ports:
      - "9210:9200"
    restart: on-failure
    environment:
      - discovery.type=single-node
      - xpack.security.enabled=false
      - "ES_JAVA_OPTS=-Xms1024m -Xmx1024m"
    volumes:
      - ${DOCKER_VOLUME_DIRECTORY:-.}/third_party/es/plugins:/usr/share/elasticsearch/plugins
      - ${DOCKER_VOLUME_DIRECTORY:-.}/volumes/es/data:/usr/share/elasticsearch/data
    command: >
      /bin/bash -c "
        mkdir -p /usr/share/elasticsearch/data /usr/share/elasticsearch/plugins &&
        chown -R elasticsearch:elasticsearch /usr/share/elasticsearch &&
        su elasticsearch -c '/usr/share/elasticsearch/bin/elasticsearch'
      "
    healthcheck:
      test: curl --fail http://localhost:9200/_cat/health || exit 1
      interval: 10s
      timeout: 20s
      retries: 3
    networks:
      - qanything-network # 添加自定义网络

  etcd:
    container_name: milvus-etcd-local
    image: cr.infini-ai.com/te-c7va2fg6uawxdzkf/etcd:v3.5.5 # 修改为私有仓库镜像
    user: root # 修改用户为 root
    environment:
      - ETCD_AUTO_COMPACTION_MODE=revision
      - ETCD_AUTO_COMPACTION_RETENTION=1000
      - ETCD_QUOTA_BACKEND_BYTES=4294967296
      - ETCD_SNAPSHOT_COUNT=50000
    volumes:
      - ${DOCKER_VOLUME_DIRECTORY:-.}/volumes/etcd:/etcd
    command: etcd -advertise-client-urls=http://127.0.0.1:2379 -listen-client-urls http://0.0.0.0:2379 --data-dir /etcd
    healthcheck:
      test: ["CMD", "etcdctl", "endpoint", "health"]
      interval: 10s
      timeout: 20s
      retries: 3
    networks:
      - qanything-network # 添加自定义网络

  minio:
    container_name: milvus-minio-local
    image: cr.infini-ai.com/te-c7va2fg6uawxdzkf/minio:RELEASE.2023-03-20T20-16-18Z # 修改为私有仓库镜像
    user: root # 修改用户为 root
    environment:
      MINIO_ACCESS_KEY: minioadmin
      MINIO_SECRET_KEY: minioadmin
    ports:
      - "9000:9000"
      - "9001:9001"
    volumes:
      - ${DOCKER_VOLUME_DIRECTORY:-.}/volumes/minio:/minio_data
    command: minio server /minio_data --console-address ":9001"
    healthcheck:
      test: ["CMD", "curl", "-f", "http://localhost:9000/minio/health/live"]
      interval: 10s
      timeout: 20s
      retries: 3
    networks:
      - qanything-network # 添加自定义网络

  standalone:
    container_name: milvus-standalone-local
    image: cr.infini-ai.com/te-c7va2fg6uawxdzkf/milvus:v2.4.8 # 修改为私有仓库镜像
    user: root # 修改用户为 root
    logging:
      driver: "json-file"
      options:
        max-size: "100m"
        max-file: "3"
    command: ["milvus", "run", "standalone"]
    security_opt:
      - seccomp:unconfined # 保留安全选项
    environment:
      ETCD_ENDPOINTS: milvus-etcd-local:2379
      MINIO_ADDRESS: milvus-minio-local:9000
    volumes:
      - ${DOCKER_VOLUME_DIRECTORY:-.}/volumes/milvus:/var/lib/milvus
    healthcheck:
      test: ["CMD", "curl", "-f", "http://localhost:9091/healthz"]
      interval: 10s
      start_period: 90s
      timeout: 20s
      retries: 3
    ports:
      - "19540:19530"
    depends_on:
      - "etcd"
      - "minio"
    networks:
      - qanything-network # 添加自定义网络

  mysql:
    container_name: mysql-container-local
    image: cr.infini-ai.com/te-c7va2fg6uawxdzkf/mysql:8.4 # 修改为私有仓库镜像
    user: "999:999" # 明确指定 MySQL 用户权限
    ports:
      - "3316:3306"
    command: --max-connections=10000
    environment:
      - MYSQL_ROOT_PASSWORD=123456
    volumes:
      - ${DOCKER_VOLUME_DIRECTORY:-.}/volumes/mysql:/var/lib/mysql
    networks:
      - qanything-network # 添加自定义网络

  qanything_local:
    container_name: qanything-container-local
    image: cr.infini-ai.com/te-c7va2fg6uawxdzkf/qanything-linux:v1.5.1 # 修改为私有仓库镜像
    command: /bin/bash -c "cd /workspace/QAnything && bash scripts/entrypoint.sh"
    user: root # 修改用户为 root
    shm_size: '8gb'
    volumes:
      - ${DOCKER_VOLUME_DIRECTORY:-.}/:/workspace/QAnything/
    ports:
      - "8777:8777"
    environment:
      - NCCL_LAUNCH_MODE=PARALLEL
      - GPUID=${GPUID:-0}
      - USER_IP=${USER_IP:-0.0.0.0}
      - GATEWAY_IP=${GATEWAY_IP:-0.0.0.0}
    depends_on:
      standalone:
        condition: service_healthy
      mysql:
        condition: service_started
      elasticsearch:
        condition: service_healthy
    tty: true
    stdin_open: true
    networks:
      - qanything-network # 添加自定义网络

networks:
  qanything-network: # 定义自定义网络
    name: qanything-network

# 主要修改说明:
# 1. 所有镜像地址改为私有仓库地址
# 2. 添加自定义网络配置,确保容器间通信
# 3. 大部分服务修改为 root 用户运行
# 4. MySQL 服务指定具体用户ID
# 5. 移除了不必要的 privileged 配置
# 6. 保留必要的端口映射
# 7. 保留必要的 volume 挂载
# 8. 添加健康检查配置
QAnything 2.0.0 的原始 Compose 文件
services:
  elasticsearch:
    container_name: es-container-local
    image: docker.elastic.co/elasticsearch/elasticsearch:8.13.2
    user: root
    privileged: true
    ports:
      - "9210:9200"
    restart: on-failure
    environment:
      - discovery.type=single-node
      - xpack.security.enabled=false
      - "ES_JAVA_OPTS=-Xms1024m -Xmx1024m"
    volumes:
      - ${DOCKER_VOLUME_DIRECTORY:-.}/third_party/es/plugins:/usr/share/elasticsearch/plugins
      - ${DOCKER_VOLUME_DIRECTORY:-.}/volumes/es/data:/usr/share/elasticsearch/data
    command: >
      /bin/bash -c "
        mkdir -p /usr/share/elasticsearch/data /usr/share/elasticsearch/plugins &&
        chown -R elasticsearch:elasticsearch /usr/share/elasticsearch &&
        su elasticsearch -c '/usr/share/elasticsearch/bin/elasticsearch'
      "
    healthcheck:
      test: curl --fail http://localhost:9200/_cat/health || exit 1
      interval: 10s
      timeout: 20s
      retries: 3

  etcd:
    container_name: milvus-etcd-local
    image: quay.io/coreos/etcd:v3.5.5
    environment:
      - ETCD_AUTO_COMPACTION_MODE=revision
      - ETCD_AUTO_COMPACTION_RETENTION=1000
      - ETCD_QUOTA_BACKEND_BYTES=4294967296
      - ETCD_SNAPSHOT_COUNT=50000
    volumes:
      - ${DOCKER_VOLUME_DIRECTORY:-.}/volumes/etcd:/etcd
    command: etcd -advertise-client-urls=http://127.0.0.1:2379 -listen-client-urls http://0.0.0.0:2379 --data-dir /etcd
    healthcheck:
      test: ["CMD", "etcdctl", "endpoint", "health"]
      interval: 10s
      timeout: 20s
      retries: 3

  minio:
    container_name: milvus-minio-local
    image: minio/minio:RELEASE.2023-03-20T20-16-18Z
    environment:
      MINIO_ACCESS_KEY: minioadmin
      MINIO_SECRET_KEY: minioadmin
    # ports:
    #   - "9001:9001"
    #       - "9000:9000"
    volumes:
      - ${DOCKER_VOLUME_DIRECTORY:-.}/volumes/minio:/minio_data
    command: minio server /minio_data --console-address ":9001"
    healthcheck:
      test: ["CMD", "curl", "-f", "http://localhost:9000/minio/health/live"]
      interval: 10s
      timeout: 20s
      retries: 3

  standalone:
    container_name: milvus-standalone-local
    image: milvusdb/milvus:v2.4.8
    logging:
      driver: "json-file"
      options:
        max-size: "100m"
        max-file: "3"
    command: ["milvus", "run", "standalone"]
    security_opt:
    - seccomp:unconfined
    environment:
      ETCD_ENDPOINTS: etcd:2379
      MINIO_ADDRESS: minio:9000
    volumes:
      - ${DOCKER_VOLUME_DIRECTORY:-.}/volumes/milvus:/var/lib/milvus
    healthcheck:
      test: ["CMD", "curl", "-f", "http://localhost:9091/healthz"]
      interval: 10s
      start_period: 90s
      timeout: 20s
      retries: 3
    ports:
      - "19540:19530"
    depends_on:
      - "etcd"
      - "minio"

  mysql:
    container_name: mysql-container-local
    privileged: true
    image: mysql:8.4
    ports:
      - "3316:3306"
    command: --max-connections=10000
    environment:
      - MYSQL_ROOT_PASSWORD=123456
    volumes:
      - ${DOCKER_VOLUME_DIRECTORY:-.}/volumes/mysql:/var/lib/mysql


  qanything_local:
    container_name: qanything-container-local
    image: xixihahaliu01/qanything-linux:v1.5.1
    command: /bin/bash -c "cd /workspace/QAnything && bash scripts/entrypoint.sh"
    privileged: true
    shm_size: '8gb'
    volumes:
      - ${DOCKER_VOLUME_DIRECTORY:-.}/:/workspace/QAnything/
    # ports:
    #   - "8777:8777"
    network_mode: "host"
    environment:
      - NCCL_LAUNCH_MODE=PARALLEL
      - GPUID=${GPUID:-0}
      - USER_IP=${USER_IP:-0.0.0.0}
      - Gateway_IP=${Gateway_IP:-0.0.0.0}
    depends_on:
      standalone:
        condition: service_healthy
      mysql:
        condition: service_started
      elasticsearch:
        condition: service_healthy
    tty: true
    stdin_open: true

#networks:
#  default:
#    name: QAnything
修改 QAnything Local 服务
为了确保容器间正常通信,同其他服务一致,qanything-container-local 也需要运行在之前创建的 qanything-network 中。QAnything 官方已经提供相关的 Python 代码,因此仅需要替换被注释的代码:
待修改的 Python 文件路径:
/datadisk/QAnything/qanything_kernel/configs/model_config.py
具体修改位置请参考下方的代码 Diff:
import os
from dotenv import load_dotenv

load_dotenv()
# 获取环境变量GATEWAY_IP
GATEWAY_IP = os.getenv("GATEWAY_IP", "localhost")
# LOG_FORMAT = "%(levelname) -5s %(asctime)s" "-1d: %(message)s"
# logger = logging.getLogger()
# logger.setLevel(logging.INFO)
# logging.basicConfig(format=LOG_FORMAT)
# 获取项目根目录
# 获取当前脚本的绝对路径
current_script_path = os.path.abspath(__file__)
root_path = os.path.dirname(os.path.dirname(os.path.dirname(current_script_path)))
UPLOAD_ROOT_PATH = os.path.join(root_path, "QANY_DB", "content")
IMAGES_ROOT_PATH = os.path.join(root_path, "qanything_kernel/qanything_server/dist/qanything/assets", "file_images")
print("UPLOAD_ROOT_PATH:", UPLOAD_ROOT_PATH)
print("IMAGES_ROOT_PATH:", IMAGES_ROOT_PATH)
OCR_MODEL_PATH = os.path.join(root_path, "qanything_kernel", "dependent_server", "ocr_server", "ocr_models")
RERANK_MODEL_PATH = os.path.join(root_path, "qanything_kernel", "dependent_server", "rerank_server", "rerank_models")
EMBED_MODEL_PATH = os.path.join(root_path, "qanything_kernel", "dependent_server", "embed_server", "embed_models")
PDF_MODEL_PATH = os.path.join(root_path, "qanything_kernel/dependent_server/pdf_parser_server/pdf_to_markdown")

# LLM streaming reponse
STREAMING = True

SYSTEM = """
You are a helpful assistant.
You are always a reliable assistant that can answer questions with the help of external documents.
Today's date is {{today_date}}. The current time is {{current_time}}.
"""

INSTRUCTIONS = """
- Answer the question strictly based on the reference information provided between <DOCUMENTS> and </DOCUMENTS>.
- Do not attempt to modify or adapt unrelated information. If the reference information does not match the person or topic mentioned in the question, respond only with: \"抱歉,检索到的参考信息并未提供任何相关的信息,因此无法回答。\"
- Before generating the answer, please confirm the following (Let's think step by step):
    1. First, check if the reference information directly matches the person or topic mentioned in the question. If no match is found, immediately return: \"抱歉,检索到的参考信息并未提供任何相关的信息,因此无法回答。\"
    2. If a match is found, ensure all required key points or pieces of information from the reference are addressed in the answer.
- Now, answer the following question based on the above retrieved documents:
{{question}}
- Please format your response in a **logical and structured manner** that best fits the question. Follow these guidelines:

    1. **Start with a concise and direct answer to the main question**.

    2. **If necessary, provide additional details** in a structured format:
       - Use **appropriate multi-level headings (##, ###, ####)** to separate different parts or aspects of the answer.
       - **Use bullet points (-, *) or numbered lists (1., 2., 3.)** if multiple points need to be highlighted.
       - **Highlight key information using bold or italic text** where necessary.

    3. **Tailor the format to the nature of the question**. For example:
       - If the question involves a list or comparison, use bullet points or tables.
       - If the question requires a more narrative answer, structure the response into clear paragraphs.

    4. **Avoid unnecessary or irrelevant sections**. Focus solely on presenting the required information in a clear, concise, and well-structured manner.
- Respond in the same language as the question "{{question}}".
"""
"""
- Please format your response in Markdown with a clear and complete structure:
    1. **Introduction**: Briefly and directly answer the main question.
    2. **Detailed Explanation** (if more relevant details are available):
       - Use **second-level headings (##)** to separate different parts or aspects of the answer.
       - Use **ordered lists** (1., 2.,3.) or **unordered lists** (-, *) to list multiple points or steps.
       - Highlight key information using **bold** or *italic* text where appropriate.
       - If the answer is extensive, conclude with a **brief summary**.
    3. **Notes**:
       - Respond in the **same language** as the question "{{question}}".
       - Avoid including irrelevant information; ensure the answer is related to the retrieved reference information.
       - Ensure the answer is well-structured and easy to understand.
"""

PROMPT_TEMPLATE = """
<SYSTEM>
{{system}}
</SYSTEM>

<INSTRUCTIONS>
{{instructions}}
</INSTRUCTIONS>

<DOCUMENTS>
{{context}}
</DOCUMENTS>
"""

CUSTOM_PROMPT_TEMPLATE = """
<USER_INSTRUCTIONS>
{{custom_prompt}}
</USER_INSTRUCTIONS>

<DOCUMENTS>
{{context}}
</DOCUMENTS>

<INSTRUCTIONS>
- All contents between <DOCUMENTS> and </DOCUMENTS> are reference information retrieved from an external knowledge base.
- Now, answer the following question based on the above retrieved documents(Let's think step by step):
{{question}}
</INSTRUCTIONS>
"""


SIMPLE_PROMPT_TEMPLATE = """
- You are a helpful assistant. You can help me by answering my questions. You can also ask me questions.
- Today's date is {{today}}. The current time is {{now}}.
- User's custom instructions: {{custom_prompt}}
- Before answering, confirm the number of key points or pieces of information required, ensuring nothing is overlooked.
- Now, answer the following question:
{{question}}
Return your answer in Markdown formatting, and in the same language as the question "{{question}}".
"""

# 缓存知识库数量
CACHED_VS_NUM = 100

# 文本分句长度
SENTENCE_SIZE = 100

# 知识库检索时返回的匹配内容条数
VECTOR_SEARCH_TOP_K = 30

VECTOR_SEARCH_SCORE_THRESHOLD = 0.3

KB_SUFFIX = '_240625'
MILVUS_HOST_LOCAL = 'milvus-standalone-local'
MILVUS_PORT = 19530
MILVUS_HOST_LOCAL = GATEWAY_IP
MILVUS_PORT = 19540
MILVUS_COLLECTION_NAME = 'qanything_collection' + KB_SUFFIX

ES_URL = 'http://es-container-local:9200/'
ES_URL = f'http://{GATEWAY_IP}:9210/'
ES_USER = None
ES_PASSWORD = None
ES_TOP_K = 30
ES_INDEX_NAME = 'qanything_es_index' + KB_SUFFIX

MYSQL_HOST_LOCAL = 'mysql-container-local'
MYSQL_PORT_LOCAL = 3306
MYSQL_HOST_LOCAL = GATEWAY_IP
MYSQL_PORT_LOCAL = 3316
MYSQL_USER_LOCAL = 'root'
MYSQL_PASSWORD_LOCAL = '123456'
MYSQL_DATABASE_LOCAL = 'qanything'

LOCAL_OCR_SERVICE_URL = "localhost:7001"

LOCAL_PDF_PARSER_SERVICE_URL = "localhost:9009"

LOCAL_RERANK_SERVICE_URL = "localhost:8001"
LOCAL_RERANK_MODEL_NAME = 'rerank'
LOCAL_RERANK_MAX_LENGTH = 512
LOCAL_RERANK_BATCH = 1
LOCAL_RERANK_THREADS = 1
LOCAL_RERANK_PATH = os.path.join(root_path, 'qanything_kernel/dependent_server/rerank_server', 'rerank_model_configs_v0.0.1')
LOCAL_RERANK_MODEL_PATH = os.path.join(LOCAL_RERANK_PATH, "rerank.onnx")

LOCAL_EMBED_SERVICE_URL = "localhost:9001"
LOCAL_EMBED_MODEL_NAME = 'embed'
LOCAL_EMBED_MAX_LENGTH = 512
LOCAL_EMBED_BATCH = 1
LOCAL_EMBED_THREADS = 1
LOCAL_EMBED_PATH = os.path.join(root_path, 'qanything_kernel/dependent_server/embedding_server', 'embedding_model_configs_v0.0.1')
LOCAL_EMBED_MODEL_PATH = os.path.join(LOCAL_EMBED_PATH, "embed.onnx")

TOKENIZER_PATH = os.path.join(root_path, 'qanything_kernel/connector/llm/tokenizer_files')

DEFAULT_CHILD_CHUNK_SIZE = 400
DEFAULT_PARENT_CHUNK_SIZE = 800
SEPARATORS = ["\n\n", "\n", "。", ",", ",", ".", ""]
MAX_CHARS = 1000000  # 单个文件最大字符数,超过此字符数将上传失败,改大可能会导致解析超时

# llm_config = {
#     # 回答的最大token数,一般来说对于国内模型一个中文不到1个token,国外模型一个中文1.5-2个token
#     "max_token": 512,
#     # 附带的上下文数目
#     "history_len": 2,
#     # 总共的token数,如果遇到电脑显存不够的情况可以将此数字改小,如果低于3000仍然无法使用,就更换模型
#     "token_window": 4096,
#     # 如果报错显示top_p值必须在0到1,可以在这里修改
#     "top_p": 1.0
# }

# Bot
BOT_DESC = "一个简单的问答机器人"
BOT_IMAGE = ""
BOT_PROMPT = """
- 你是一个耐心、友好、专业的机器人,能够回答用户的各种问题。
- 根据知识库内的检索结果,以清晰简洁的表达方式回答问题。
- 不要编造答案,如果答案不在经核实的资料中或无法从经核实的资料中得出,请回答"我无法回答您的问题。"(或者您可以修改为:如果给定的检索结果无法回答问题,可以利用你的知识尽可能回答用户的问题。)
"""
BOT_WELCOME = "您好,我是您的专属机器人,请问有什么可以帮您呢?"
启动 QAnything 服务
执行云盘目录中的 compose 文件
# 设置  QAnything 目录指向云盘中的目录
export DOCKER_VOLUME_DIRECTORY=/datadisk/QAnything
# 执行云盘目录中的 compose 文件
docker compose -f /datadisk/QAnything/docker-compose-linux-infini.yaml up -d
# 如果使用共享高性能存储
docker compose -f /mnt/public/QAnything/docker-compose-linux-infini.yaml up -d
输出示例:
root@is-dage55yhoxvt7cim-devmachine-0:~# docker compose -f /datadisk/QAnything/docker-compose-linux-infini.yaml up -d
[+] Running 63/6
 ✔ etcd Pulled                                                                                                           22.9s
 ✔ mysql Pulled                                                                                                          14.5s
 ✔ qanything_local Pulled                                                                                               149.5s
 ✔ minio Pulled                                                                                                          16.8s
 ✔ elasticsearch Pulled                                                                                                  29.5s
 ✔ standalone Pulled                                                                                                     19.0s
[+] Running 7/7
 ✔ Network qanything-network            Created                                                                           0.1s
 ✔ Container es-container-local         Healthy                                                                          39.9s
 ✔ Container milvus-minio-local         Started                                                                          19.5s
 ✔ Container milvus-etcd-local          Started                                                                          19.3s
 ✔ Container mysql-container-local      Started                                                                          19.6s
 ✔ Container milvus-standalone-local    Healthy                                                                          30.3s
 ✔ Container qanything-container-local  Started                                                                          40.2s
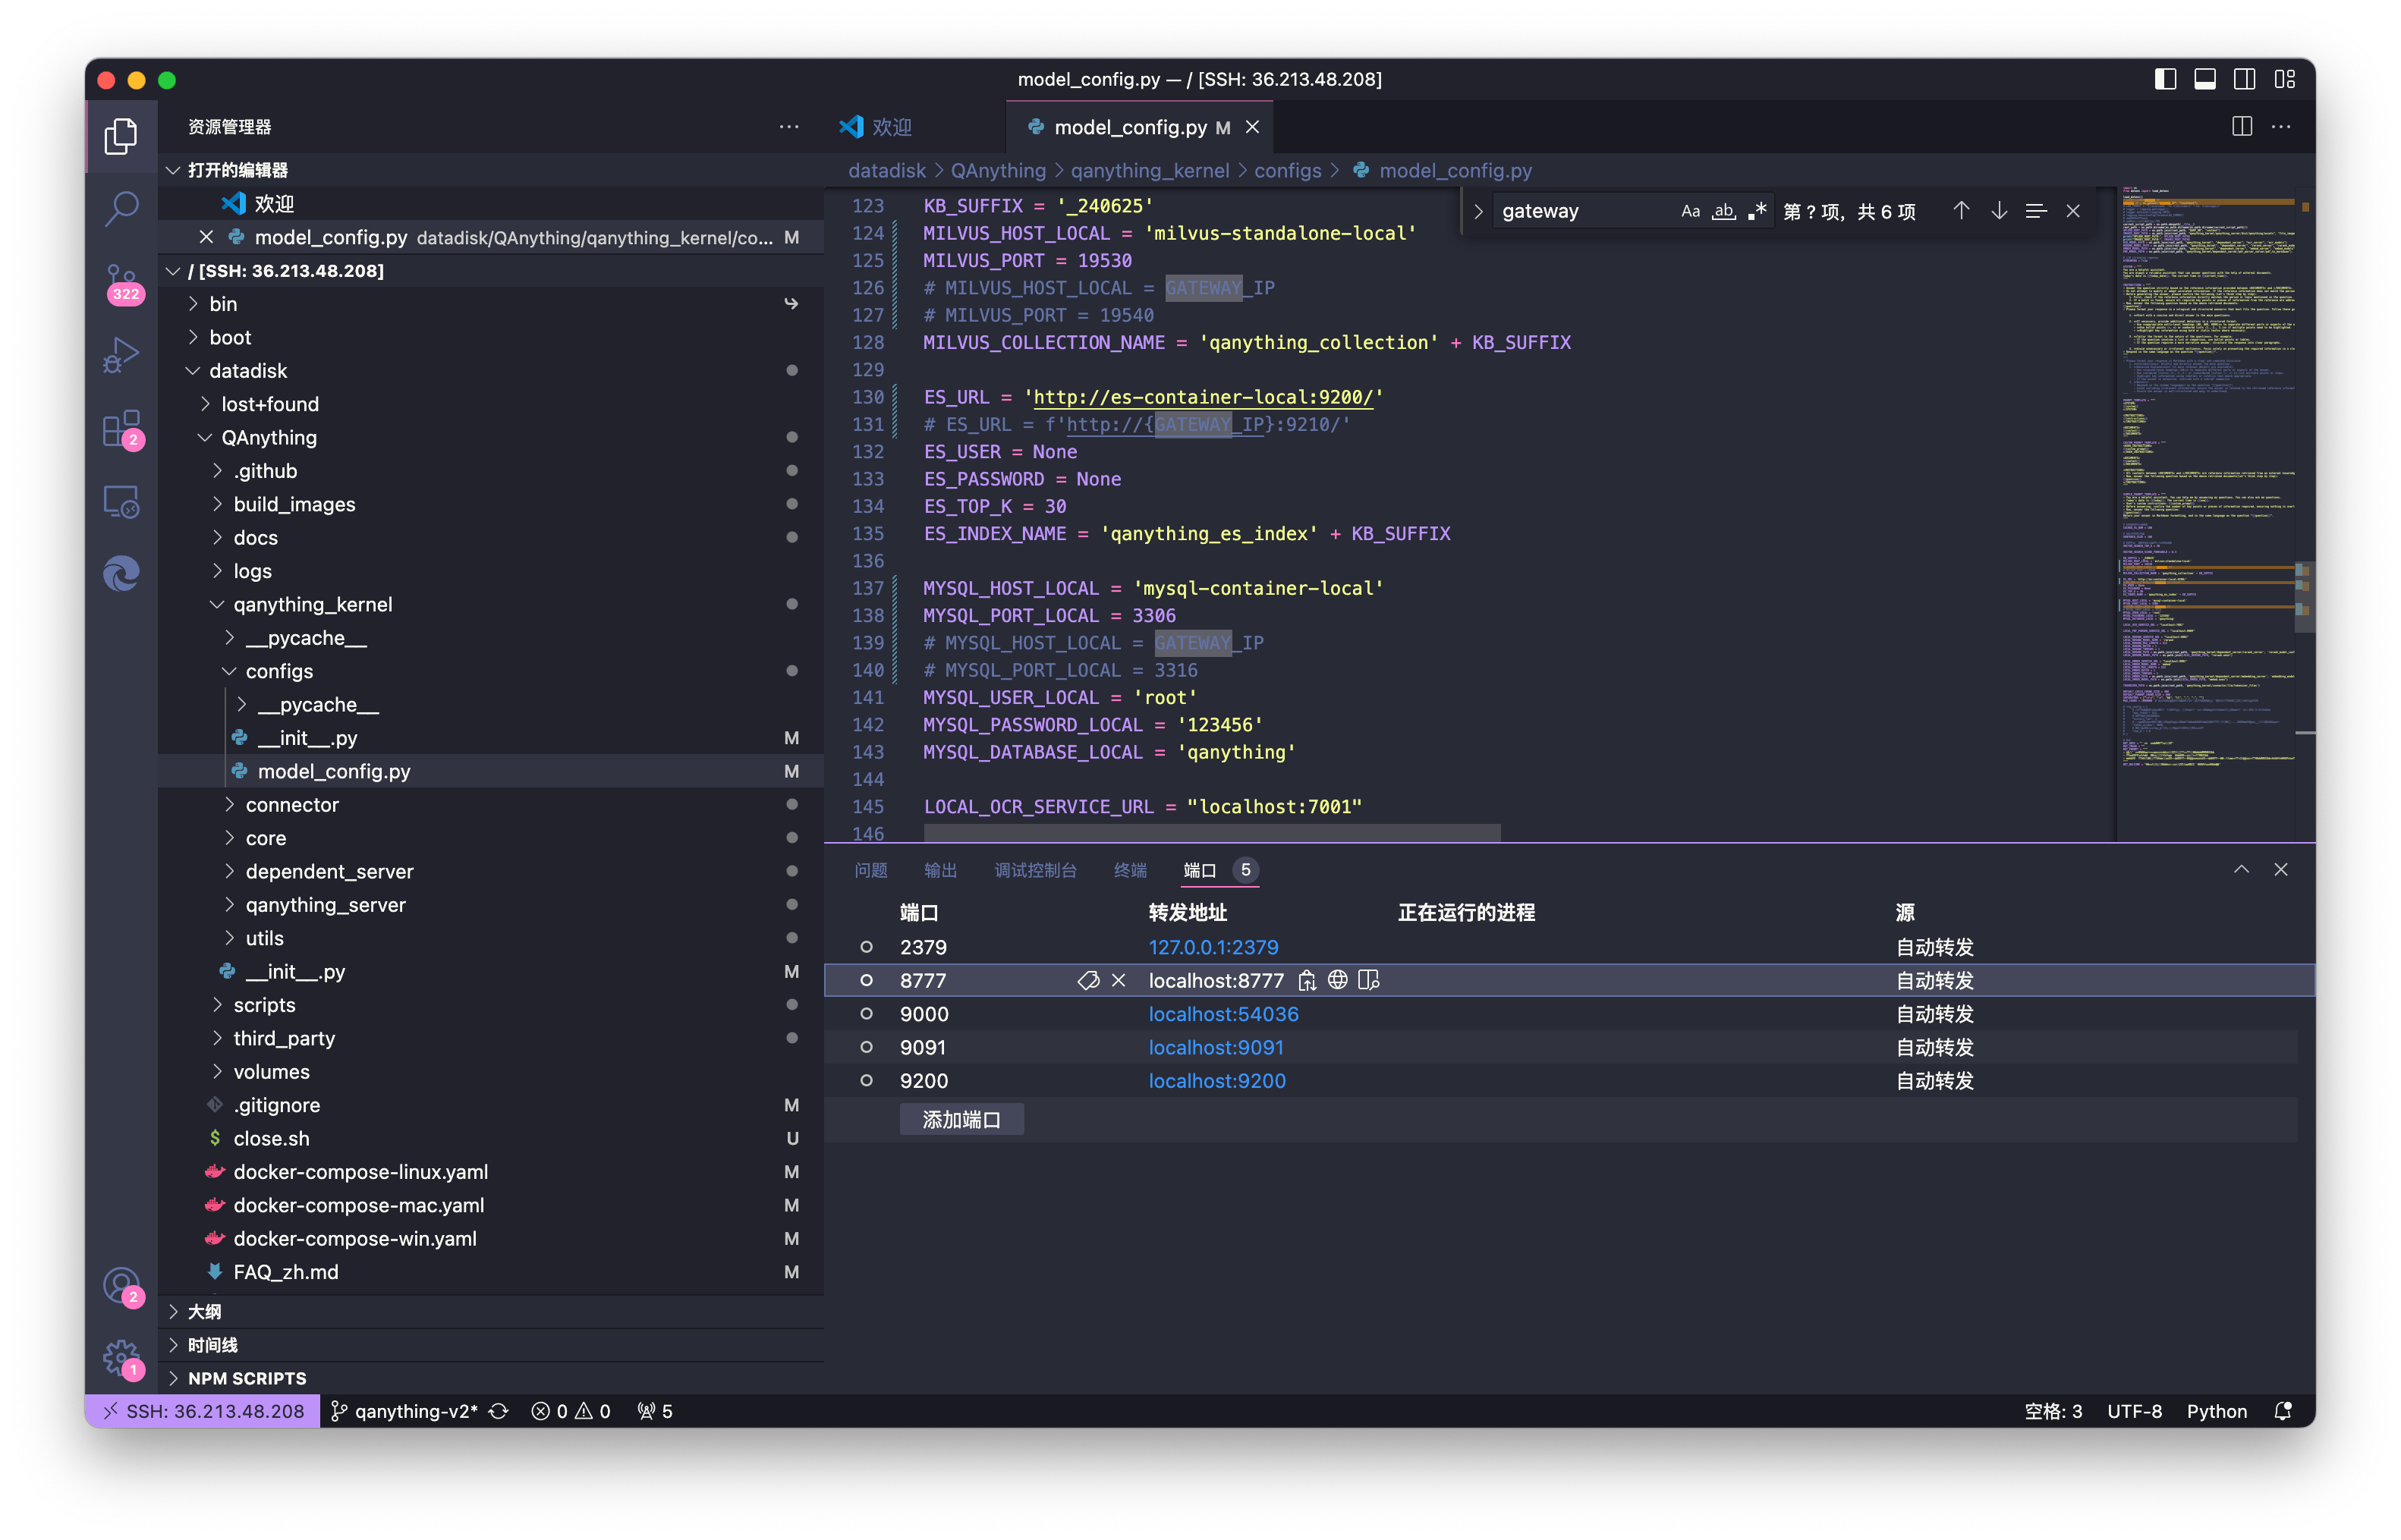
如果使用 VS Code 连接开发机,在 VS Code 终端启动服务后,VS Code 会自动配置 SSH 端口转发。
在 VS Code 终端中可以切换到端口标签,查看具体的端口映射:

如果使用其他 Shell 工具,需要手动配置 SSH 端口转发。参考教程SSH 端口转发:公网访问开发机内 HTTP 服务。
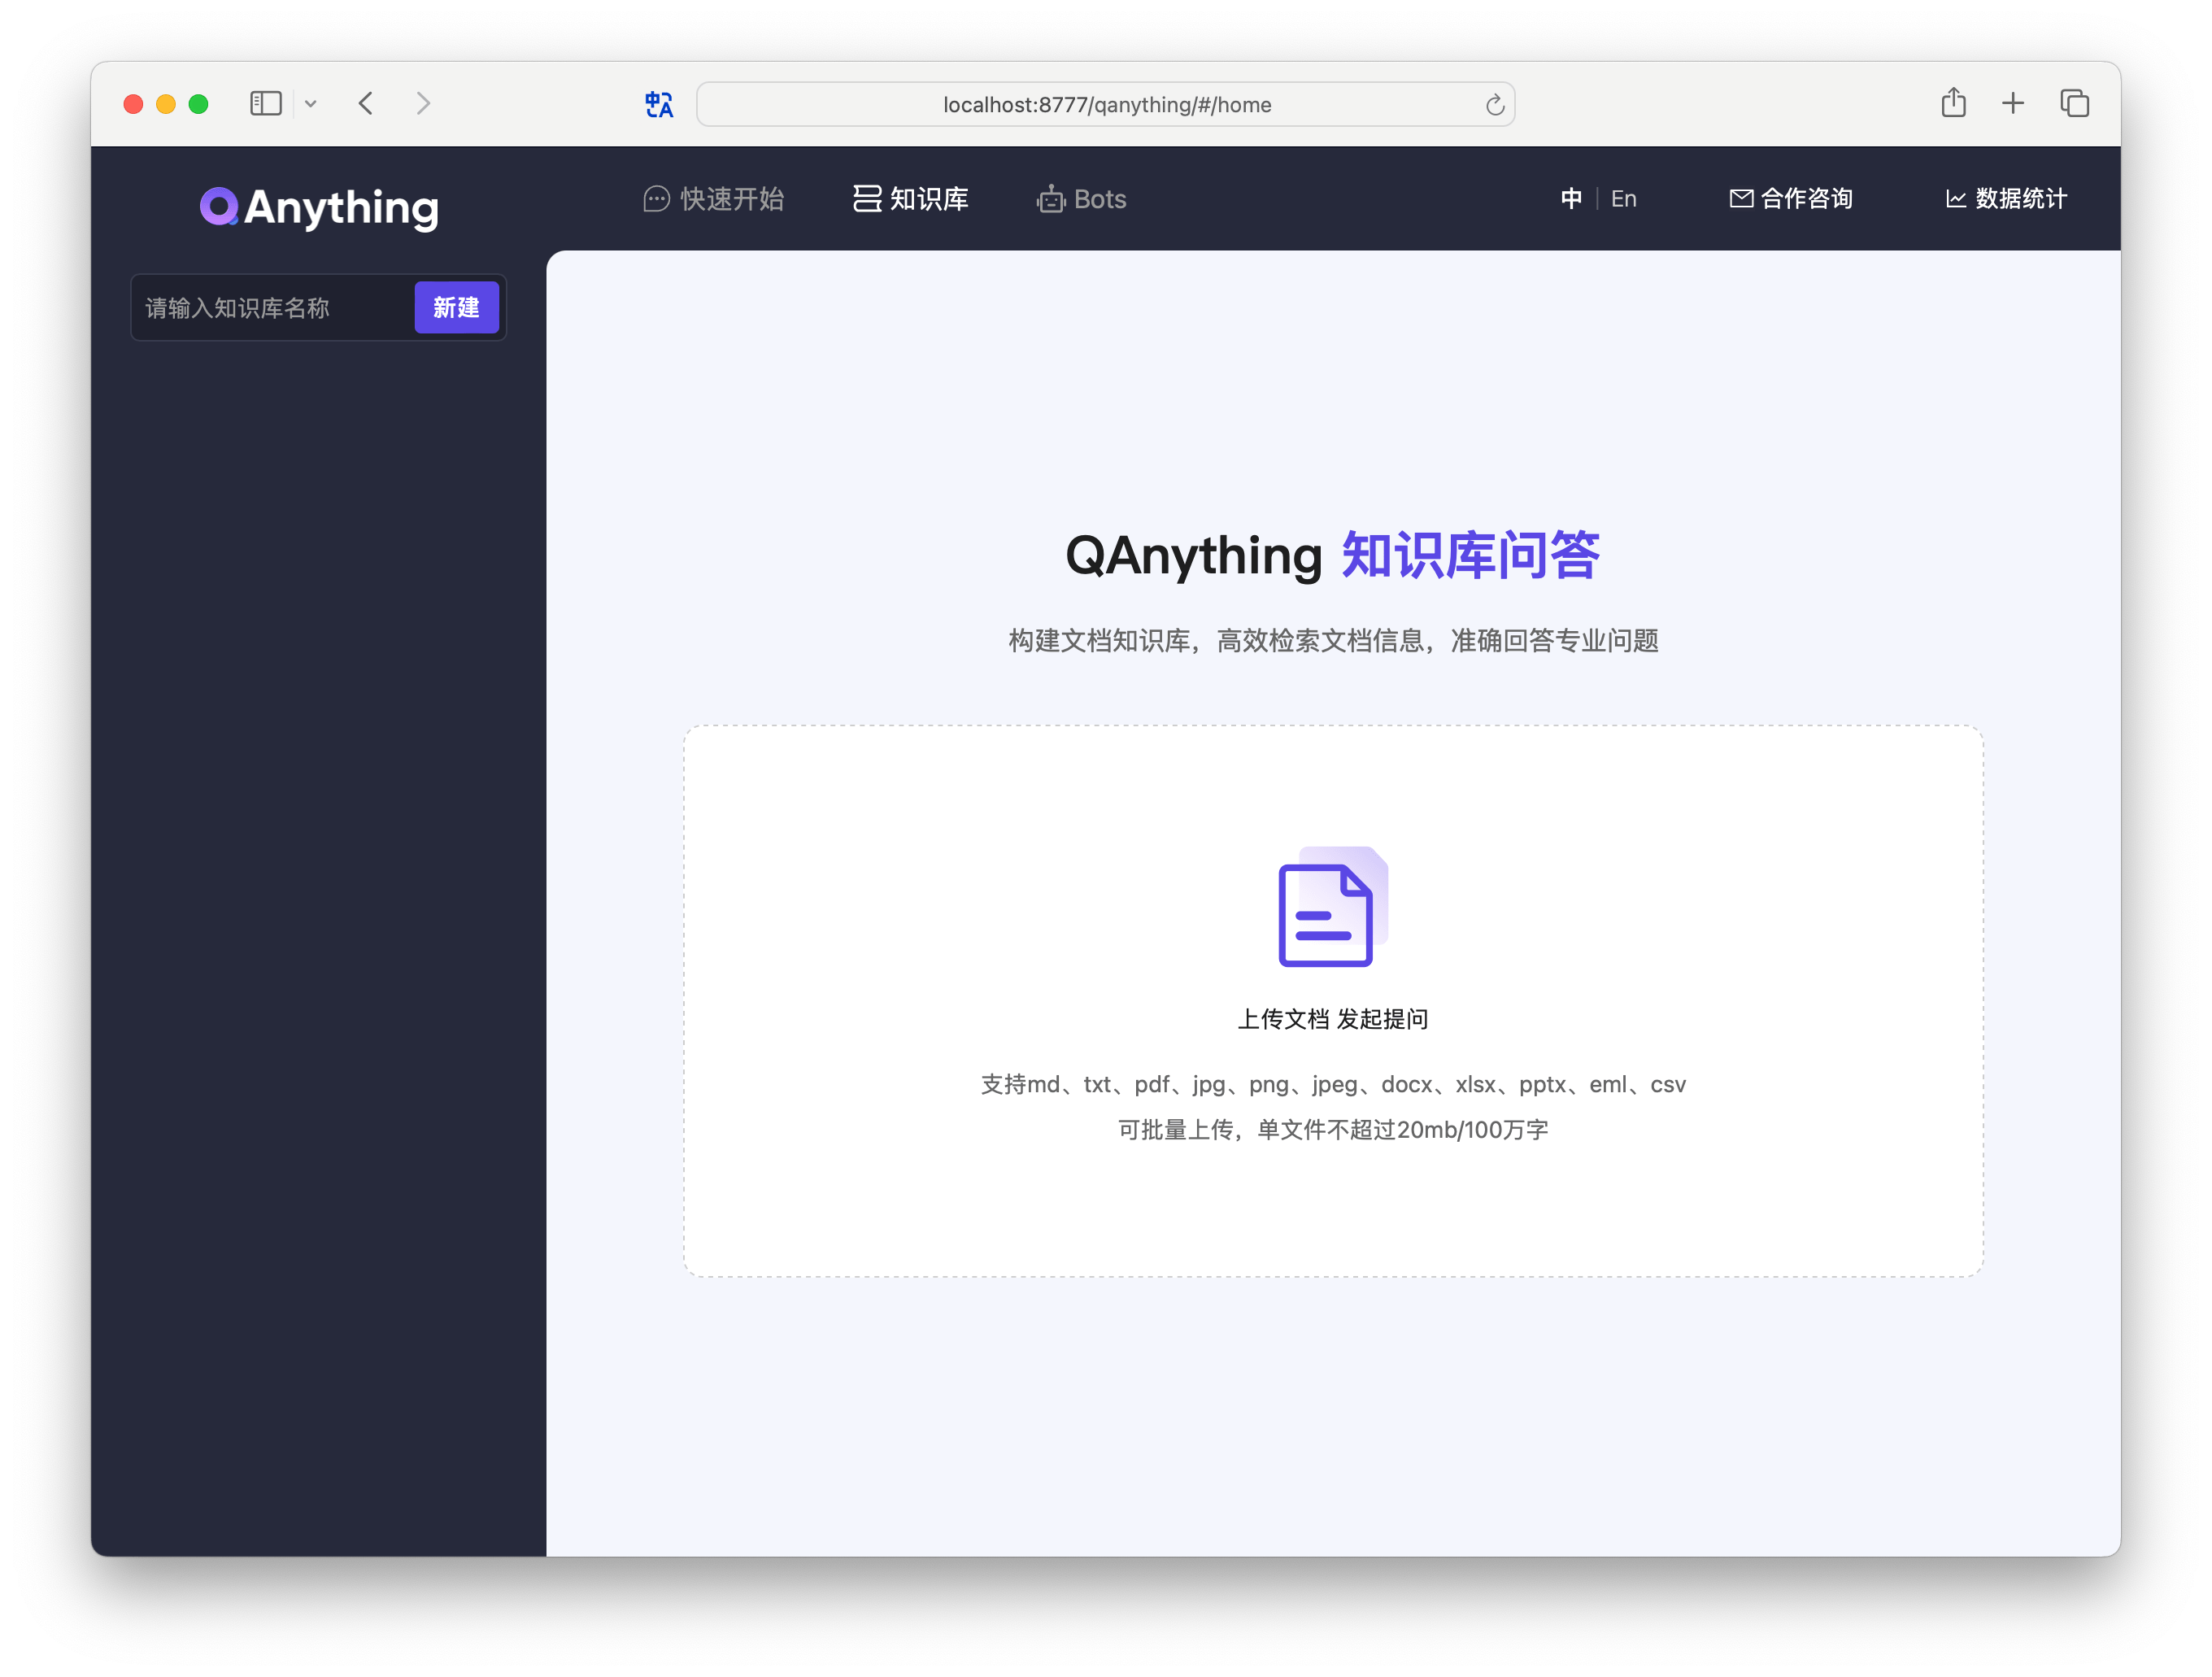
SSH 端口转发配置成功后,即可在浏览器中访问 QAnything 的前端页面:http://localhost:8777/。

已知局限
- 无法从 Docker Hub(
docker.io)拉取镜像(包括未指定 Registry 前缀和显式指定docker.io的命令)。如采用第三方镜像加速服务,无法保证稳定性与速率。如果提前将镜像保存至租户私有仓库,该问题将得到改善。 - 部署 QAnything 依赖持久化存储,但开发机内部容器无法挂载开发机 rootfs 上的目录。暂时必须使用云盘或共享高性能存储。
后续步骤
- 接入 GenStudio LLM API
- 科学安装 Ollama: 如果需要在同一台开发机上安装和访问 Ollama,请注意通过
OLLAMA_HOST环境变量将 Ollama 服务绑定至0.0.0.0。请注意通过OLLAMA_ORIGINS环境变量允许跨域访问。请在启动qanything-container-local服务时通过extra_hosts将开发机的 IP 地址映射至开发机hostname,通过hostname:11434从容器内访问 Ollama 服务。