在 AIStudio 开发机的 Conda 环境中安装 ComfyUI
本教程将引导您通过如何在 AIStudio 开发机中启用 Conda 环境,用于安装和配置 ComfyUI。
以下安装步骤已为 AIStudio 开发机优化。
实验环境
进入 AIStudio 开发机创建页面后,请根据页面提示,完成开发机的相应配置。点击下方链接,直接访问智算云控制台的创建开发机页面。
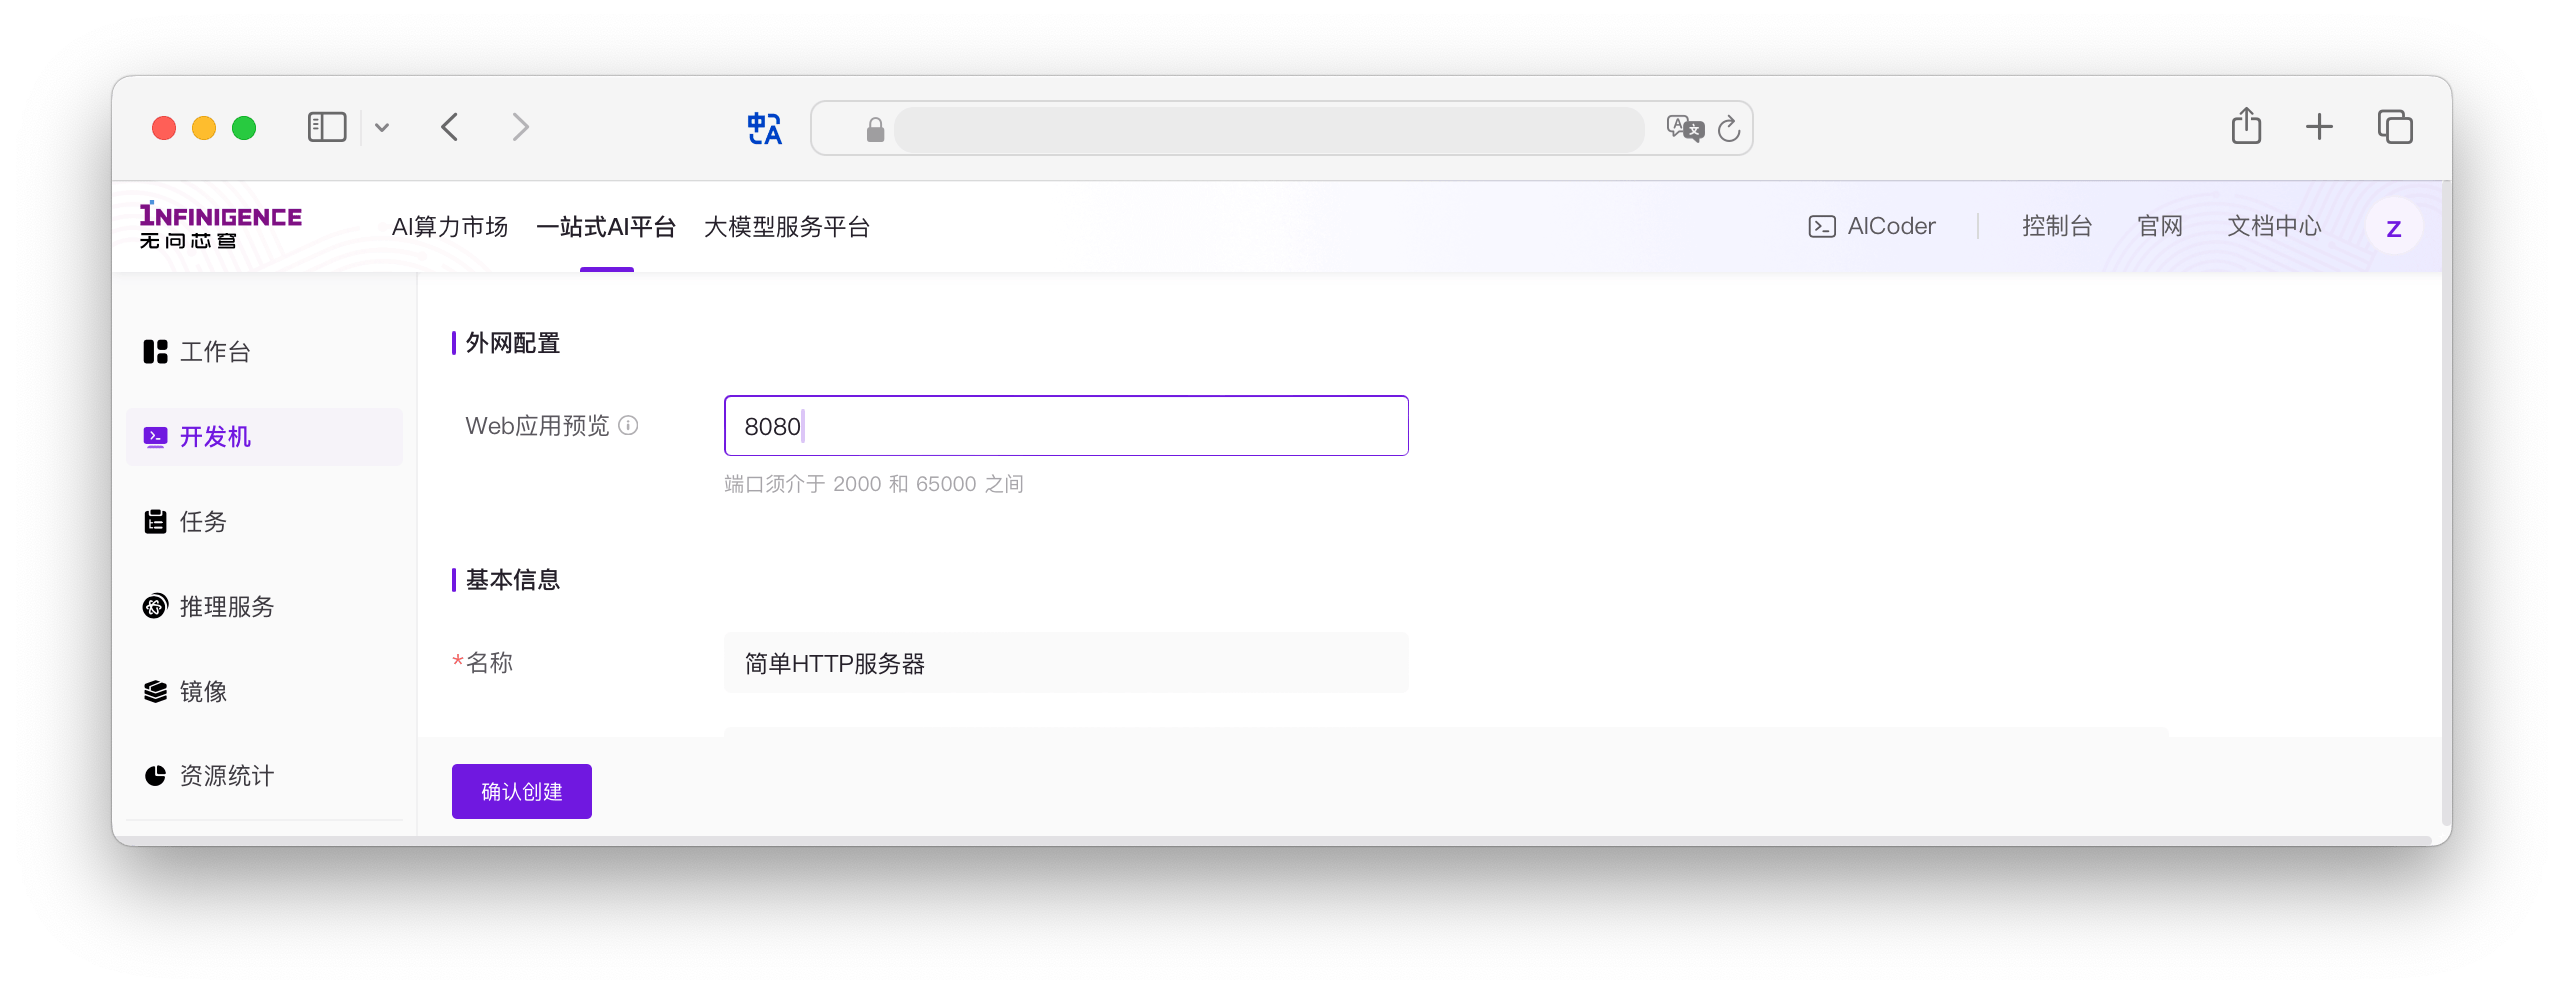
在选择配置镜像时,请选择预置镜像中的 ubuntu:22.04。为了可在线访问 ComfyUI 页面,推荐提前配置 Web 应用预览端口号,例如 8080。

Conda
先准备好一个适当的 Conda 环境。我们将使用开发机 Ubuntu 22.04 镜像自带的 Miniconda。
启用镜像自带的 Miniconda
智算云平台预置了基于 Ubuntu、CentOS 的多种基础镜像和第三方镜像,绝大部分已自带 Miniconda,一般在 /usr/local/ 下的目录。
# 添加 conda 到 PATH
source /usr/local/miniconda3/etc/profile.d/conda.sh
# 初始化 conda,持久化写入 .bashrc
conda init
启用后请注意关闭当前 Shell 会话,再新建会话。
修改默认 Conda 源为清华镜像源
由于国内网络问题,可能无法访问 Conda 自带源,或访问速度极慢。因此,建议使用国内镜像源,如清华镜像源。
注意
如果非全新环境,可先删除 $HOME/.condarc 文件,再执行下面的操作。
下面示例使用 cat 命令直接追加写入了 ~/.condarc,请注意勿重复添加。
# 添加清华镜像源。
cat << EOF >> ~/.condarc
channels:
  - defaults
show_channel_urls: true
default_channels:
  - https://mirrors.tuna.tsinghua.edu.cn/anaconda/pkgs/main
  - https://mirrors.tuna.tsinghua.edu.cn/anaconda/pkgs/r
  - https://mirrors.tuna.tsinghua.edu.cn/anaconda/pkgs/msys2
custom_channels:
  conda-forge: https://mirrors.tuna.tsinghua.edu.cn/anaconda/cloud
  msys2: https://mirrors.tuna.tsinghua.edu.cn/anaconda/cloud
  bioconda: https://mirrors.tuna.tsinghua.edu.cn/anaconda/cloud
  menpo: https://mirrors.tuna.tsinghua.edu.cn/anaconda/cloud
  pytorch: https://mirrors.tuna.tsinghua.edu.cn/anaconda/cloud
  pytorch-lts: https://mirrors.tuna.tsinghua.edu.cn/anaconda/cloud
  simpleitk: https://mirrors.tuna.tsinghua.edu.cn/anaconda/cloud
  deepmodeling: https://mirrors.tuna.tsinghua.edu.cn/anaconda/cloud/
  nvidia: https://mirrors.sustech.edu.cn/anaconda-extra/cloud
EOF
然后清除相关缓存:
conda clean -i
conda clean -p
conda clean -a
ComfyUI
以下步骤将指导您如何在 Conda 环境中正确安装 ComfyUI 及其所需的依赖包。
克隆 ComfyUI 代码仓库
为顺利拉取 GitHub 代码,需要使用 GitHub 学术加速服务 和仓库的 HTTPS 地址。
git clone https://ghfast.top/https://github.com/comfyanonymous/ComfyUI.git创建 Conda 环境
ComfyUI 官方 README 推荐使用 Python 3.12。后续安装步骤均在此虚拟环境中进行。
conda create -n comfyenv python==3.12
conda activate comfyenv
使用 Conda 安装 Pytorch
由于 Conda 源已替换为清华源后,可放心地直接使用 Pytorch 官方工具生成的 Conda 安装命令:
安装携带预编 CUDA 12.1 的 Pytorch 最新版:
conda install pytorch torchvision torchaudio pytorch-cuda=12.1 -c pytorch -c nvidia注意
- 如果在 Conda 环境中安装和使用 ComfyUI,请尽量避免使用 Pip 方式安装 Pytorch 及相关依赖。该安装方式与 ComfyUI 官方文档一致。
- ComfyUI 官方 README 未使用 Conda,因而统一使用 pip 方式安装依赖。该方式不适用于本教程覆盖的场景。
使用 Conda 安装部分依赖项
ComfyUI 官方 requirements 中列出 Python 包里,部分包如 Pillow、 scipy 依赖底层系统库。conda 能够很好地管理 Python 包和系统级库,因此强烈建议使用 conda 提前安装部分依赖项:
conda install -c conda-forge scipy kornia spandrel soundfile pillow注意
- conda 可确保为 Python 包安装兼容版本的二进制文件,减少了由于系统库或编译扩展的不同版本导致的问题。
- pip 并不擅长管理系统级依赖。对于需要底层系统库的包(非 python 包),您可能需要手动安装兼容版本的系统依赖或者使用官方提供的预编译 wheel。
安装其他依赖项
cd ComfyUI
pip install -r requirements.txt
在线访问 ComfyUI 界面
启动 ComfyUI:
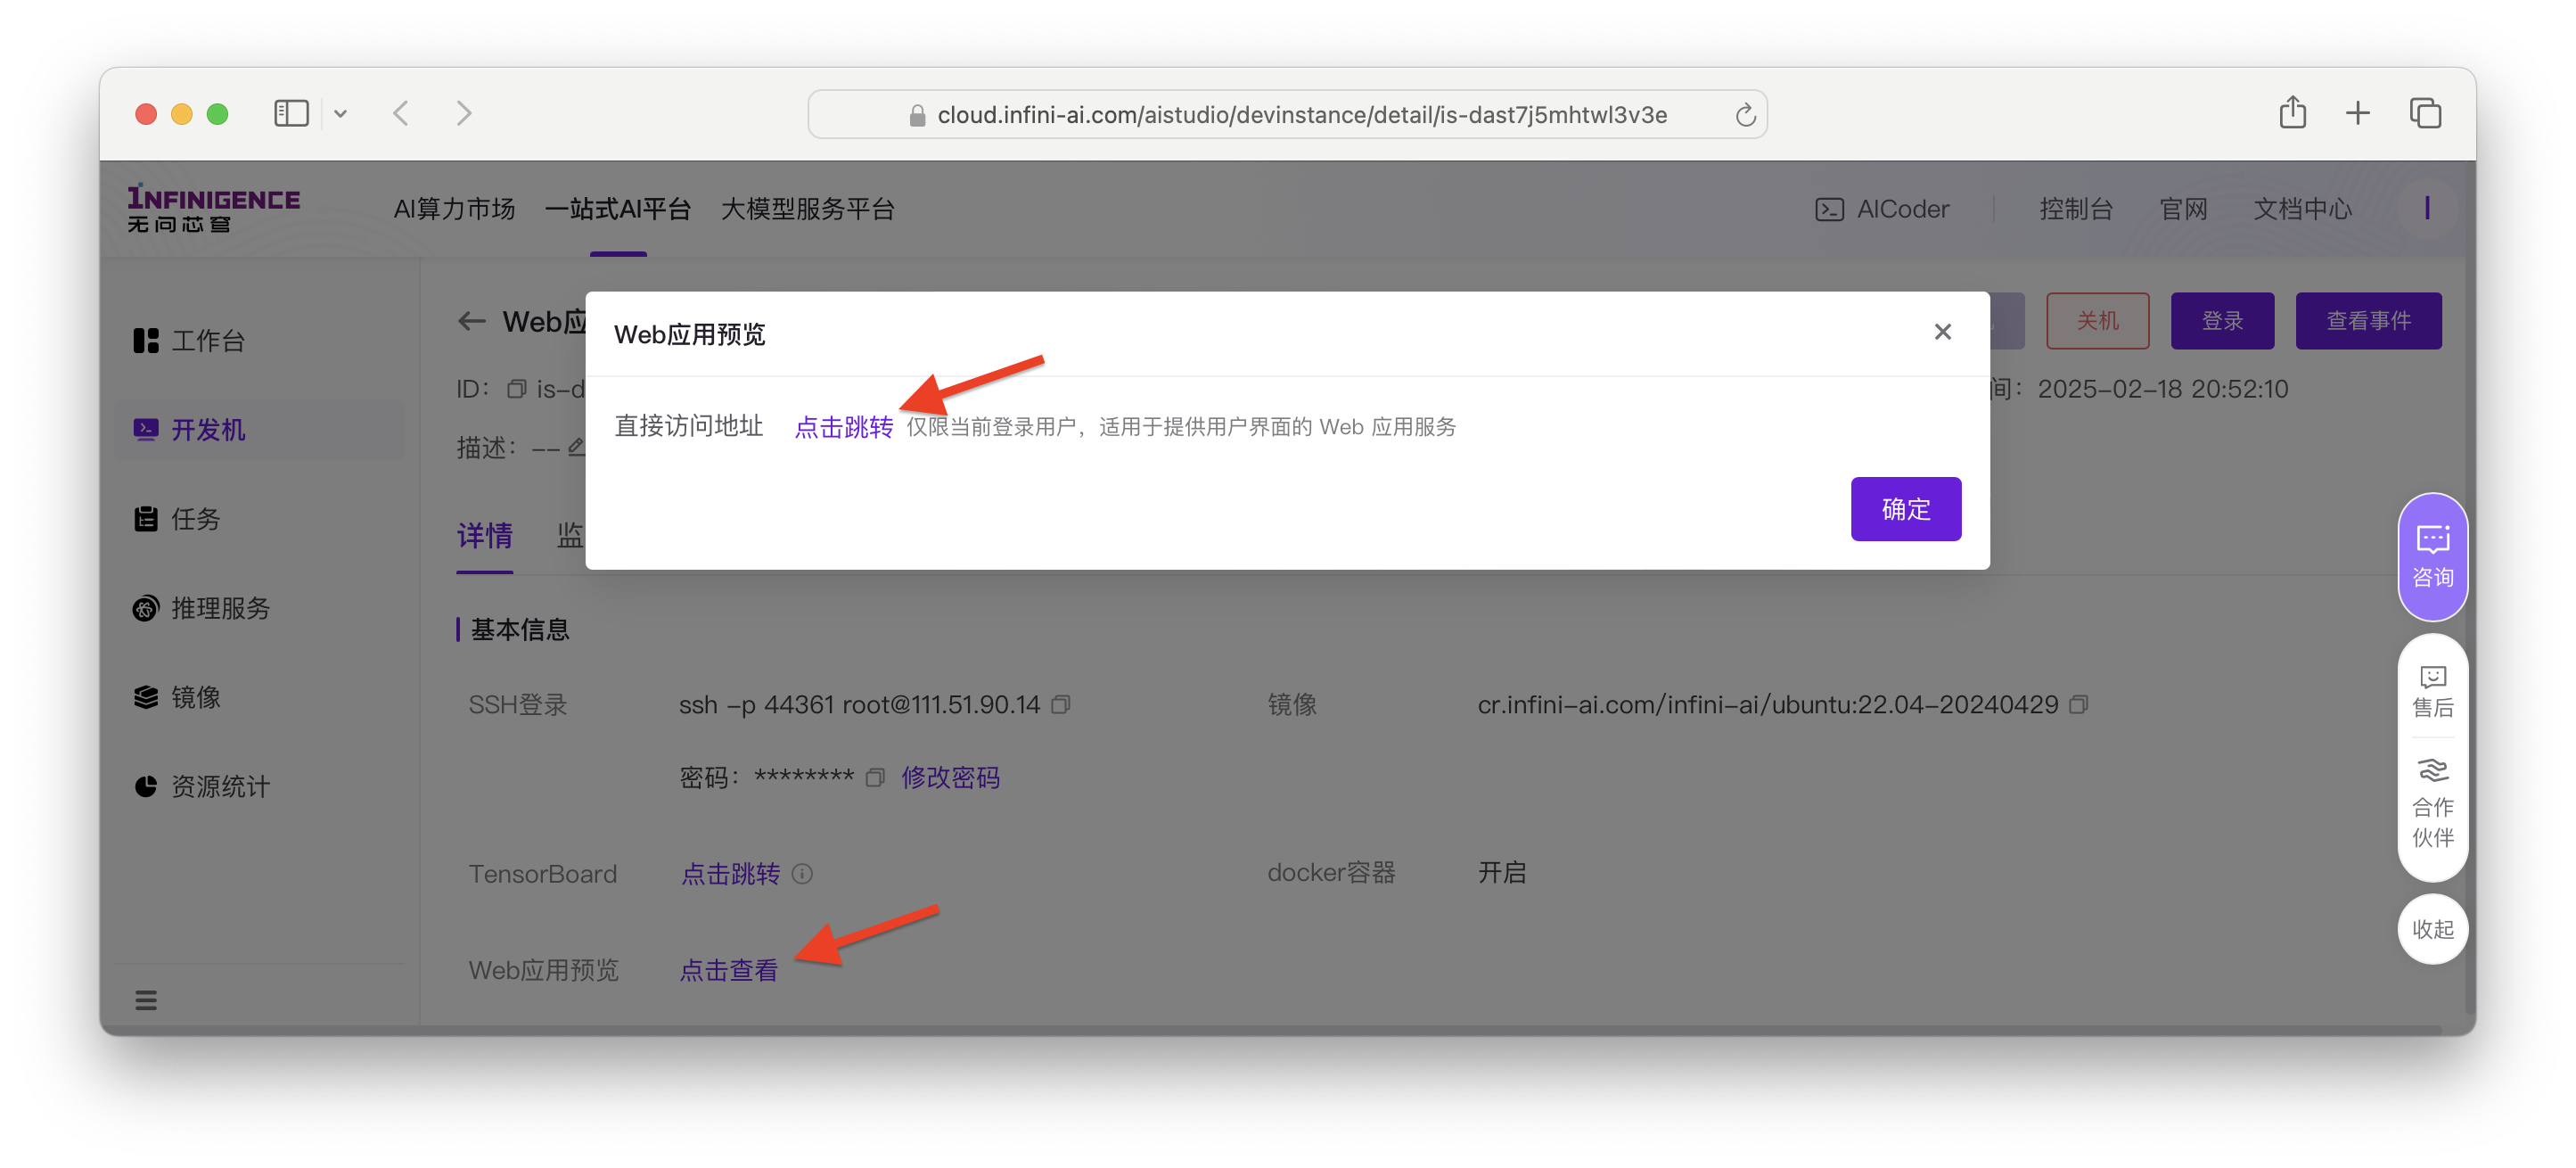
python main.py --listen 0.0.0.0 --port 8080启动成功后,可在开发机详情页直接跳转 ComfyUI 页面。

进入到 ComfyUI 页面后,您可以直接拖拽您的 JSON、图片等格式的工作流文件到 ComfyUI 页面中,即可创建新的工作流。
参考资料
- ComfyUI GitHub
- 第三方学术加速服务指南:借助第三方学术加速服务安装自定义节点
- 使用 HuggingFace 镜像站下载模型和数据集:下载模型
- 云盘:如开发机系统盘空间不足,可考虑购买云盘。「云盘」是无问芯穹基于分布式块存储的持久化存储产品,具有高可靠、高可用、高性能的特点。
- 共享高性能存储:如开发机系统盘空间不足,可联系商务或售后服务,购买共享高性能存储。