

获取系统级 CUDA/cuDNN 环境
在使用 AIStudio 开发机、推理服务、训练服务时,很多用户会遇到系统级 CUDA 和 cuDNN 相关的安装问题。
本文汇总了在 AIStudio 平台获取系统级 CUDA 和 cuDNN 环境的几种方式,这些方式已经过验证,可帮助您顺利完成环境配置。
注意
如果您尚不清楚什么是系统级 CUDA,建议提前阅读教程 NVIDIA CUDA Toolkit 与 PyTorch 安装中的 CUDA 的区别。
为什么需要系统级 CUDA/cuDNN
在进行深度学习开发时,很多用户会遇到缺失系统级 CUDA 和 cuDNN 的问题,特别是 PyTorch 已经提供了带有 CUDA 和 cuDNN 支持的预编译版本,经常让人困惑。
Huggingface Transformers 文档中有如下描述:
PyTorch’s pip and conda builds come prebuilt with the cuda toolkit which is enough to run PyTorch, but it is insufficient if you need to build cuda extensions.
大意是说 PyTorch 通过 pip 和 conda 提供的构建版本已经预装了 CUDA 工具包,但无法构建 CUDA 扩展。文档中还说,由于正确安装系统级的 CUDA 工具包可能会很复杂,因此 PyTorch 和 NVIDIA 发布了 NGC Docker 容器版本的 Pytorch。
因此,如果您的场景中存在以下任意情况,则需要安装系统级 CUDA 或 cuDNN:
- 要求下载安装 NVIDIA CUDA Toolkit,例如 LLaMA Factory 安装文档
- 要求使用 nvcc,例如 DeepSpeed
获取系统级 CUDA/cuDNN 的几种方式
您可以在 AIStudio 平台快速获取已安装系统级 CUDA 和 cuDNN 环境的容器镜像,这些镜像可用于平台开发机、推理服务、任务模块。另外,您也可以手动安装 CUDA / cuDNN。
使用平台预置镜像
AIStudio 平台镜像中心 中 CUDA 和 NGC 镜像均预装了 CUDA Toolkit 和 cuDNN。
- 预置 CUDA 镜像:来自 nvidia/cuda 镜像仓库 的
12.2.2-cudnn8-devel-ubuntu20.04镜像,其中预装了 NVIDIA CUDA Toolkit 12.2 和 cuDNN8 - 预置 NGC 镜像:来自 NGC Docker 容器版本的 Pytorch 的镜像,例如
pytorch-24.03-py3、pytorch-23.11-py3,其中预装软件的具体版本可查询NGC Pytorch 官方 Release Notes。
直接拉取 NGC Pytorch 镜像
AIStudio 平台镜像中心已支持通过 URL 直接从公网拉取镜像,保存为租户的自定义镜像。
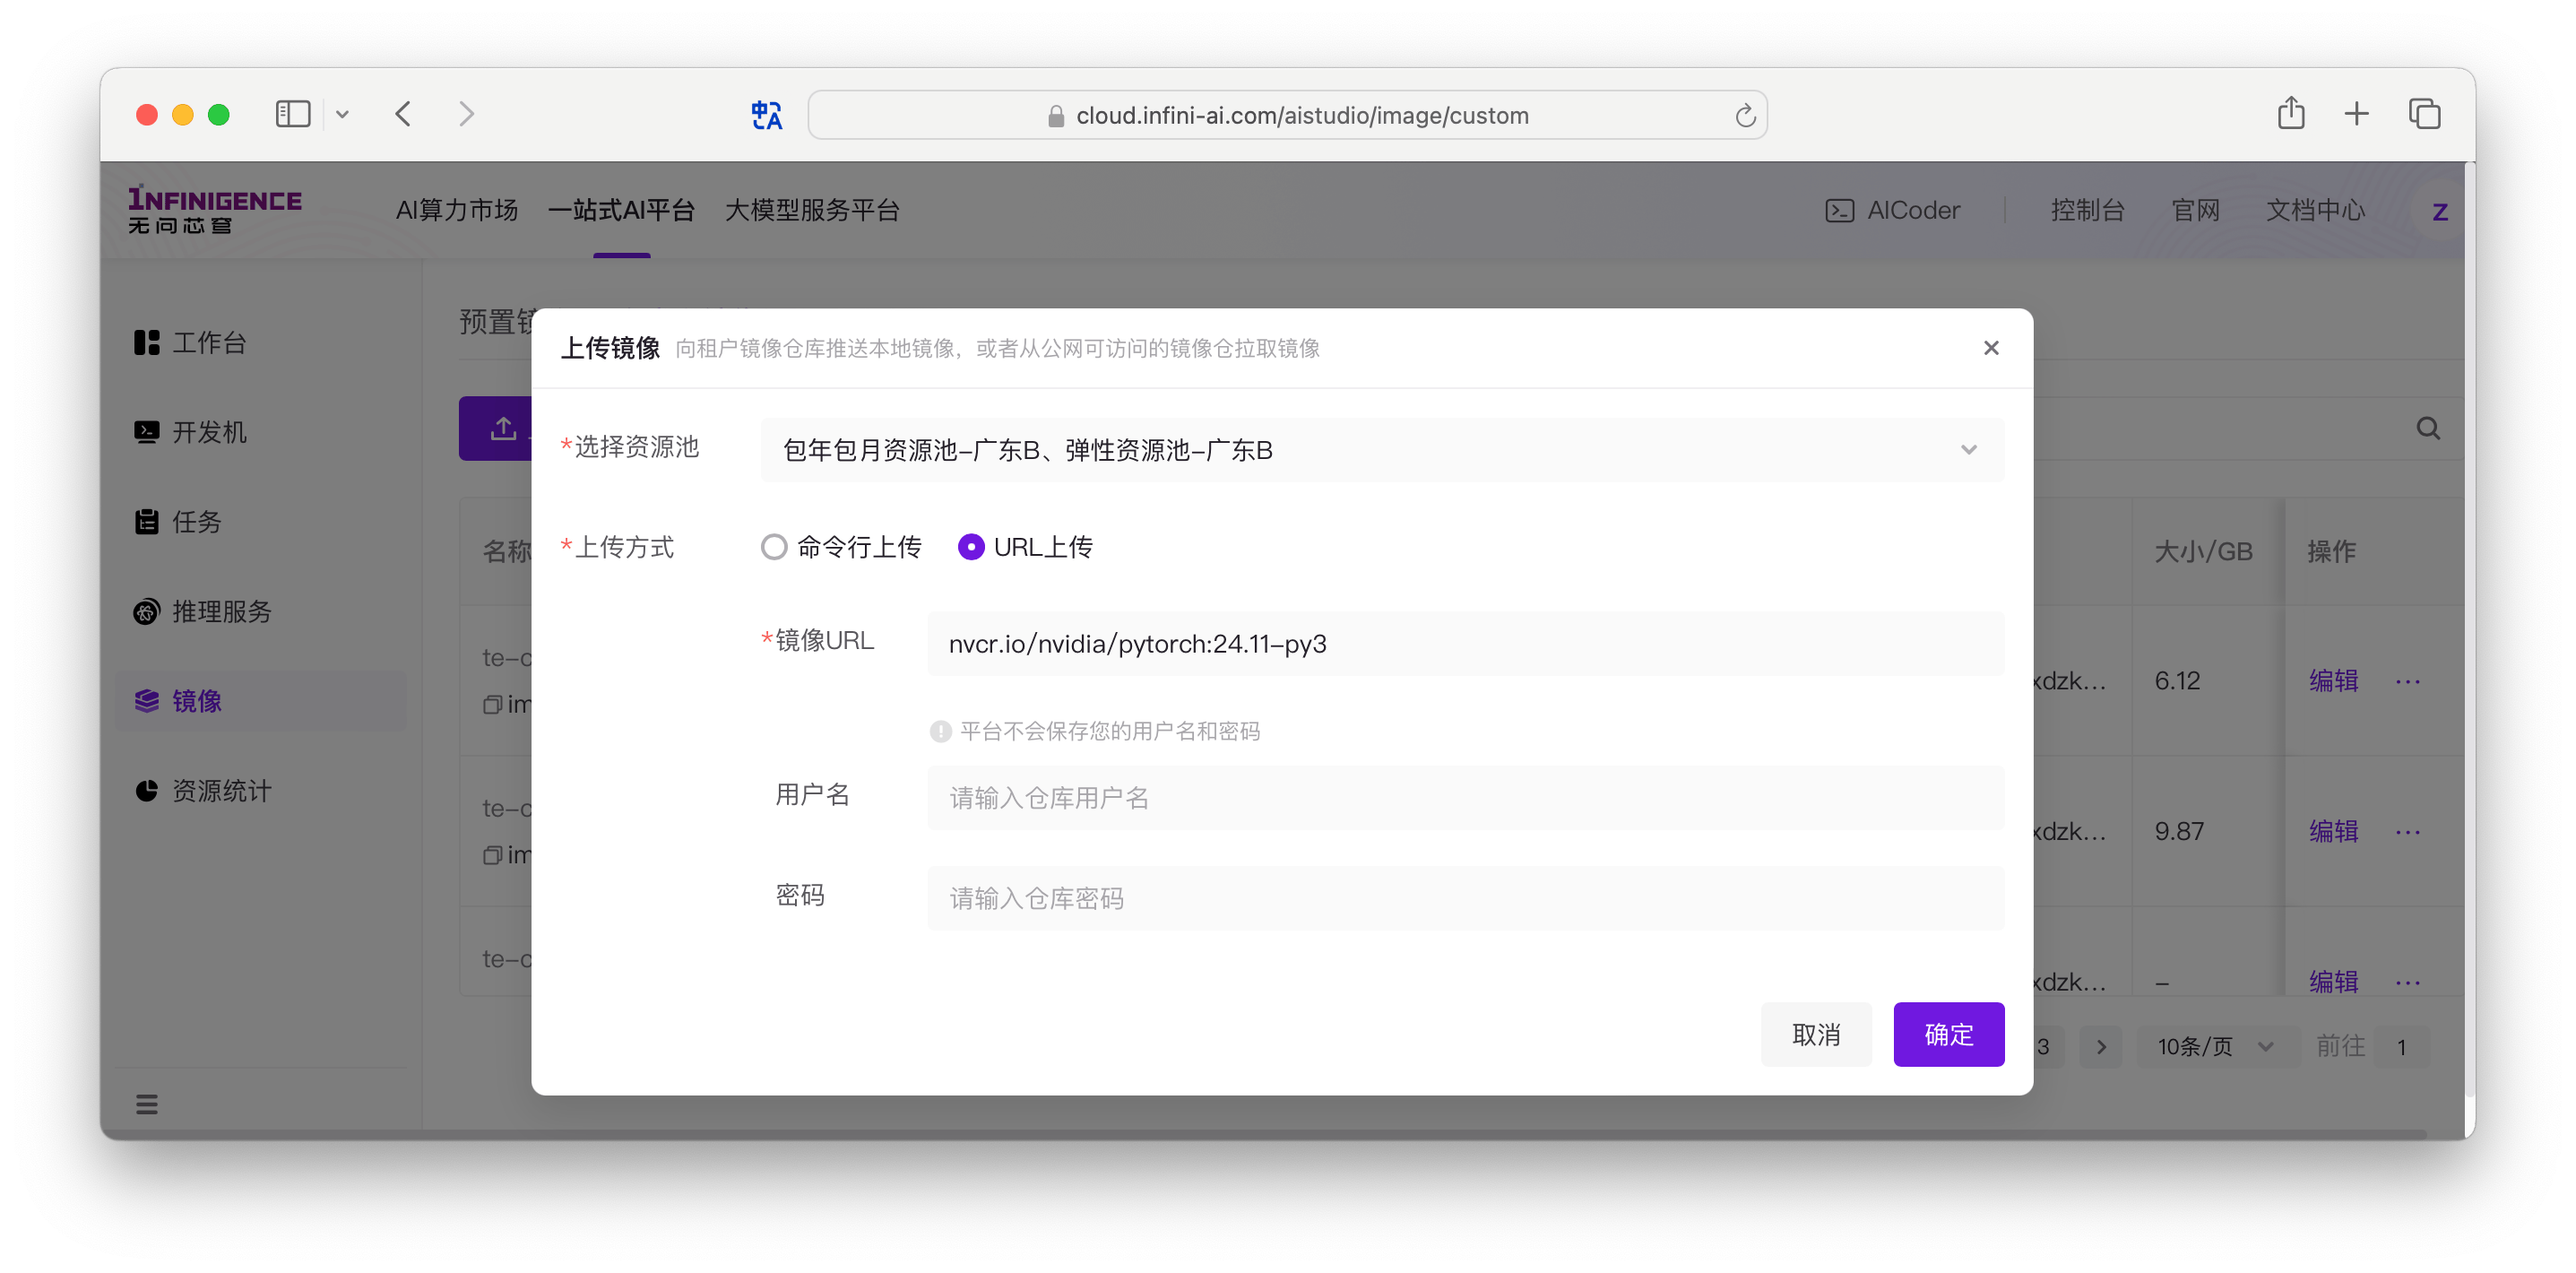
操作方式详见文档 迁移外部镜像至租户镜像仓库
使用 Dockerfile 构建镜像
AIStudio 平台镜像中心支持直接编写 Dockerfile 构建镜像。我们已为不同 CUDA 和 cuDNN 版本组合提供了经过优化的 Dockerfile 及详细说明,请根据需求参考对应文档:
仅安装 CUDA(不含 cuDNN)
如果只需要 CUDA Toolkit 而不需要 cuDNN,可参考以下任意一篇文档中 CUDA 安装部分(即环境变量配置和 CUDA runfile 安装步骤),跳过 cuDNN 安装步骤即可:
- 包含 CUDA 12.9.1 与 cuDNN 9 的 Dockerfile (Ubuntu 22.04)
- 包含 CUDA 12.4.1 与 cuDNN 9 的 Dockerfile (Ubuntu 22.04)
CUDA 与 cuDNN 9.x(通过 apt 安装)
- 包含 CUDA 12.9.1 与 cuDNN 9 的 Dockerfile (Ubuntu 22.04)
- 包含 CUDA 12.8.1 与 cuDNN 9 的 Dockerfile (Ubuntu 24.04)
- 包含 CUDA 12.4.1 与 cuDNN 9 的 Dockerfile (Ubuntu 22.04)
提示
以上文档均包含替换其他 CUDA 版本的说明。如需安装 CUDA 12.2.2 + cuDNN 9.x,只需按照文档中的版本替换指引修改 runfile 名称和路径数字即可。
CUDA 与 cuDNN 8.x(通过 redist 脚本免密安装)
部分应用要求 cuDNN 8.x 或更早版本。由于从 NVIDIA 官网下载历史版本需要开发者账号登录验证,我们提供了使用 parse_redist.py 工具免密下载安装的方案:
手动在开发机安装特定版本的系统级 CUDA/cuDNN
如果上述方式无法满足您的要求,可以使用开发机和 Ubuntu 基础镜像,手动安装 CUDA / cuDNN。安装完成后,可以将开发机保存为自定义镜像,在平台其他服务模块中复用环境。
我们已提供详细教程,请移步在容器化 Ubuntu 22.04 上安装特定版本 CUDA/cuDNN。