

使用 atlctl 进行原地调试
AIStudio 任务功能提供 atlctl 命令行调试工具,您可以从 Web Terminal 登录任意的任务 Worker,执行停止任务、统一下发测试命令等调试工作。
注意
atlctl 提供手动调试能力。如需了解自动化的环境检测和容错功能,请参阅容错功能文档。
了解调试状态
atlctl 命令行调试工具可手动控制任务的生命周期。运行中的任务在生命周期中的部分状态下,可被手动设置为调试(Debug)状态。在调试状态下,允许用户对所有任务 Worker 统一发起检测,或下发测试命令等。调试结束后,可恢复任务执行。
生命周期说明:
- Bootcheck / Troubleshoot(橙色):自动化环境检测阶段,默认开启,可通过容错功能配置关闭或自定义检测项
- Running(蓝色):执行用户代码阶段
- Debug(绿色):atlctl 手动调试阶段,可执行环境检测、烧机测试、自定义命令等操作
提示
自动化环境检测(Bootcheck/Troubleshoot)由容错功能控制,支持配置检测时机、检测项和触发条件。详见容错功能文档。
进入调试状态
必须从网页端登录任务 Worker。打开 Web Terminal 后,可直接使用 atlctl 工具。
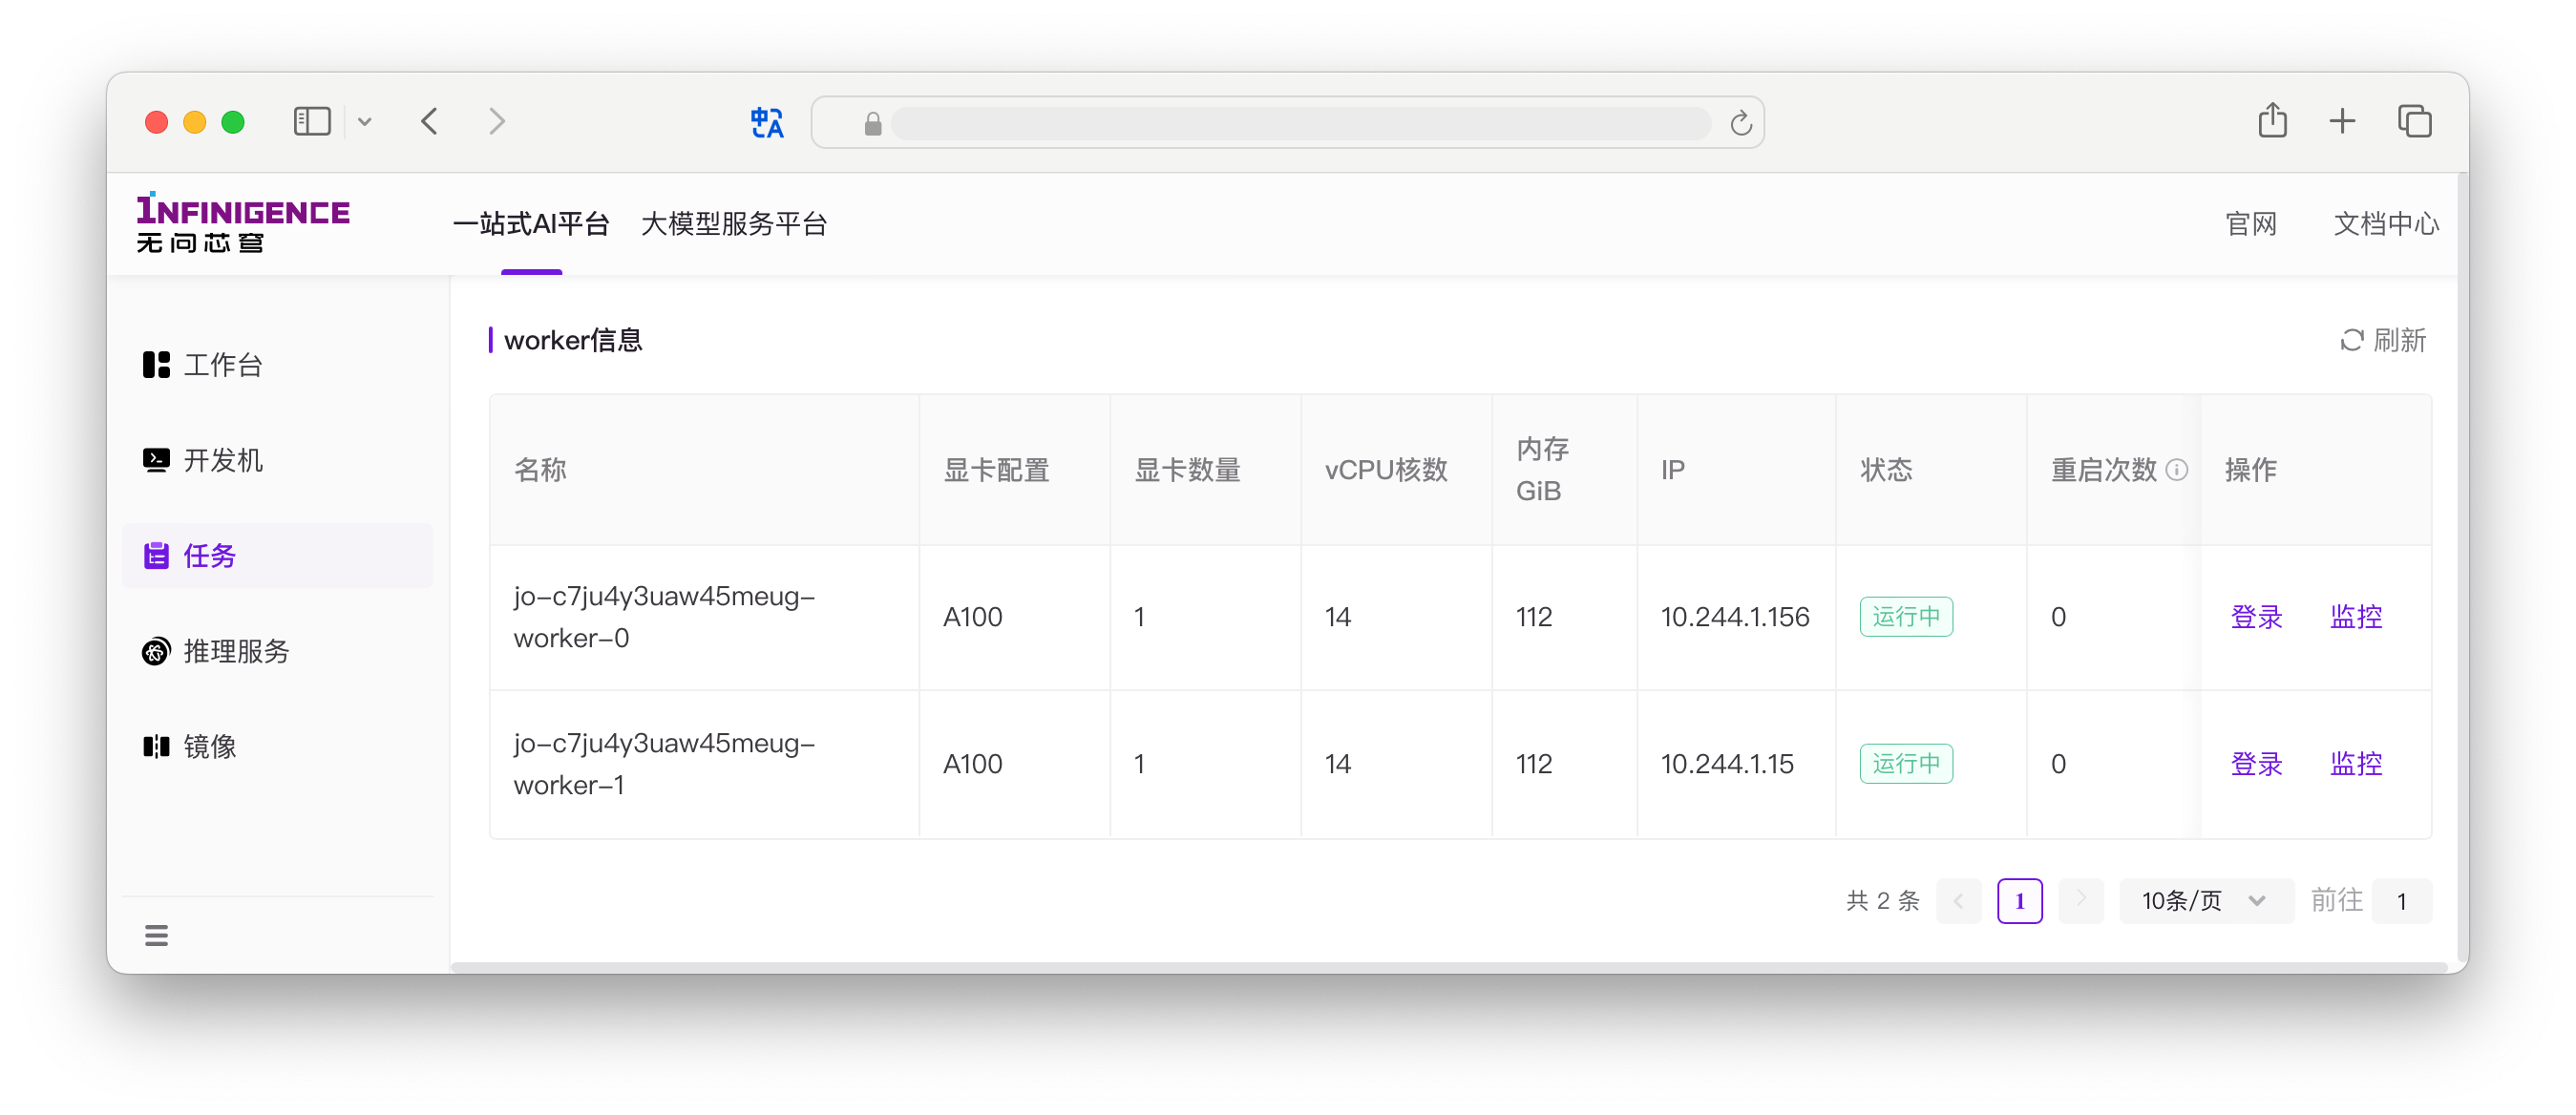
Worker 登录入口在任务详情页 Worker 信息中,点击登录后可打开 Web Terminal。
注意
仅在任务运行中时可登录 Worker。
使用流程
以下提供三个使用流程范例:
- 执行 atlctl 工具内置检测
- 执行用户自定义检测脚本
- 执行 GPU 和通信烧机测试
执行内置检测脚本
atlctl 工具内置了 GPU 与通信检测脚本,默认可对任务中的全部 Worker 进行检测 GPU 和通讯检测。支持通过添加参数检测具体项目和自定义的临时环境变量。
登录任务的任意一个 Worker,按下方步骤操作:
查看训练任务状态。如果输出 Job status 为
command,表示当前仍在执行任务中的用户代码。shellroot@jo-daxbirgzm6e727pd-worker-0:~# atlctl status Job status: command为了执行检测,需要先停止当前训练任务,将任务置于 Debug 状态。
shellroot@jo-daxbirgzm6e727pd-worker-0:~# atlctl stop Stopping task in all workers... Stop job task success.建议检查当前任务是否有 python 进程残留,如有则清理。
shellroot@jo-daxbirgzm6e727pd-worker-0:~# atlctl run "ps -ef |grep python |grep -v grep |grep -v tini |awk '{print \$2}'|xargs kill -9" Send command to all workers success.每次执行
atlctl run后,必须执行atlctl stop,否则无法再次下发其他atlctl命令。shellatlctl stop执行 atlctl 工具内置检测脚本。
shellroot@jo-daxbirgzm6e727pd-worker-0:~# atlctl check All workers will be checked. Check finished. Check Quit.检查结束,未发现问题,可终止检测。
shellroot@jo-daxbirgzm6e727pd-worker-0:~# atlctl stop Stopping task in all workers... Stop job task success.如需恢复任务运行,请先查看训练任务是否处于 debugStop 状态。
shellroot@jo-daxbirgzm6e727pd-worker-0:~# atlctl status Job status: debugStop如果任务状态已处于 debugStop 状态,可恢复训练任务:
shellroot@jo-daxbirgzm6e727pd-worker-0:~# atlctl status Job status: debugStop root@jo-daxbirgzm6e727pd-worker-0:~# atlctl recover Task recovering... Task recover success.
执行自定义调试命令
自定义的流程与执行内置检测主流程类似,区别仅在于使用 atlctl run 下发自定义检测命令。
登录任务的任意一个 Worker,按下方步骤操作:
查看训练任务状态。
shellroot@jo-daxbirgzm6e727pd-worker-0:~# atlctl status Job status: command输出 Job status 为
command表示正在执行任务中的启动命令。停止当前训练任务,将任务置于 Debug 状态。
shellroot@jo-daxbirgzm6e727pd-worker-0:~# atlctl stop Stopping task in all workers... Stop job task success.建议检查当前任务是否有 python 进程残留,如有则清理。
shellroot@jo-daxbirgzm6e727pd-worker-0:~# atlctl run "ps -ef |grep python |grep -v grep |grep -v tini |awk '{print \$2}'|xargs kill -9" Send command to all workers success.每次执行
atlctl run后,必须执行atlctl stop,否则无法再次下发其他atlctl命令。shellroot@jo-daxbirgzm6e727pd-worker-0:~# atlctl stop Stopping task in all workers... Stop job task success.执行自定义测试命令。
atlctl run支持使用-r/--ranks选择仅在部分 rank 上执行,或用-f/--force在非 debugStop 状态下强制执行(谨慎使用)。如有多个命令需要连续运行,建议封装为 Shell 脚本。shell# 在全部 worker(rank) 上执行脚本 root@jo-daxbirgzm6e727pd-worker-0:~# atlctl run /mnt/public/debug/test-comms.sh # 仅在 rank 0,1,2 上执行 root@jo-daxbirgzm6e727pd-worker-0:~# atlctl run -r 0,1,2 /mnt/public/debug/test-comms.sh # 在 rank 0-3 范围内执行 root@jo-daxbirgzm6e727pd-worker-0:~# atlctl run -r 0-3 /mnt/public/debug/test-comms.sh # 混合选择 rank(单个 + 范围) root@jo-daxbirgzm6e727pd-worker-0:~# atlctl run -r 0,2-4,7 /mnt/public/debug/test-comms.sh # 未 stop 直接强制执行(不检查 debugStop 状态) root@jo-daxbirgzm6e727pd-worker-0:~# atlctl run -f sleep 60调试结束,终止测试任务:
shellroot@jo-daxbirgzm6e727pd-worker-0:~# atlctl stop Stopping task in all workers... Stop job task success.如需恢复任务运行,请先查看训练任务是否处于 debugStop 状态。
shellroot@jo-daxbirgzm6e727pd-worker-0:~# atlctl status Job status: debugStop如果任务状态已处于 debugStop 状态,可恢复训练任务:
shellroot@jo-daxbirgzm6e727pd-worker-0:~# atlctl status Job status: debugStop root@jo-daxbirgzm6e727pd-worker-0:~# atlctl recover Task recovering... Task recover success.
执行 GPU 和通信烧机测试
当需要对任务中的 Worker 进行性能压力测试时,可以使用 atlctl burn 命令。烧机测试可以帮助发现硬件问题、评估性能表现或验证系统稳定性。
登录任务的任意一个 Worker,按下方步骤操作:
查看训练任务状态。
shellroot@jo-daxbirgzm6e727pd-worker-0:~# atlctl status Job status: command停止当前训练任务,将任务置于 Debug 状态。
shellroot@jo-daxbirgzm6e727pd-worker-0:~# atlctl stop Stopping task in all workers... Stop job task success.执行 GPU 烧机测试。例如,运行 GPU Gemm 计算测试 5 分钟:
shellroot@jo-daxbirgzm6e727pd-worker-0:~# atlctl burn -t gemm -d 5m或者执行通信烧机测试,测试 allreduce 性能:
shellroot@jo-daxbirgzm6e727pd-worker-0:~# atlctl burn -t global -d 3m -e NCCL_DEBUG=WARN烧机测试完成后,停止测试任务:
shellroot@jo-daxbirgzm6e727pd-worker-0:~# atlctl stop Stopping task in all workers... Stop job task success.确认任务状态并恢复训练任务:
shellroot@jo-daxbirgzm6e727pd-worker-0:~# atlctl status Job status: debugStop root@jo-daxbirgzm6e727pd-worker-0:~# atlctl recover Task recovering... Task recover success.
手动强制删除掉卡节点
当节点出现掉卡(GPU异常、硬件故障等)导致任务卡住时,任务可能长时间无法自动退出。此时可通过以下步骤手动强制删除异常节点,加快任务重启或释放资源。
登录任务的任意一个 Worker,按下方步骤操作:
首先查看任务当前状态,确认任务是否处于异常或挂起状态:
shellroot@jo-daxbirgzm6e727pd-worker-0:~# atlctl status Job status: command若任务仍在执行用户代码(如
Job status: command),建议先将任务切换到调试(Debug)状态,避免消耗用户任务的容错次数:shellroot@jo-daxbirgzm6e727pd-worker-0:~# atlctl stop Stopping task in all workers... Stop job task success.执行强制删除命令,直接清理所有的 pod 节点:
shellroot@jo-daxbirgzm6e727pd-worker-0:~# atlctl delete -p all Send delete worker pod command to specified workers successfully.删除后任务会自动重启,可通过任务详情页面监控重启进度。
此流程适用于节点掉卡、任务长时间卡住无法自动退出等场景,可有效加快故障恢复和资源释放。
命令说明
atlctl 工具提供以下命令。
burn
atlctl burn 提供通信和 GPU 烧机测试功能。该命令可以对任务中的 Worker 进行各种类型的性能压力测试,包括 GPU 计算、内存传输和网络通信测试。
root@jo-daxbirgzm6e727pd-worker-0:~# atlctl burnburn 命令选项
-t, --burnType <type>:指定执行的烧机测试类型。默认为gemm。选项:gemm: 执行 GPU Gemm 烧机测试transfer: 执行 GPU 设备到主机和主机到设备的传输烧机测试local: 执行本地 allreduce 烧机测试global: 执行全局 allreduce 烧机测试batch: 执行批量 allreduce 烧机测试(必须设置 worker 列表)
-d, --duration <duration>:指定测试持续时间。默认为20s。选项:20s: 20 秒5m: 5 分钟10min: 10 分钟
-e, --envs <envs>:指定测试的环境变量。格式:key1=value1: 设置单个环境变量"key1=value1,value1.1;key2=value2;...": 通过分号分隔的键值对列表设置多个环境变量
-w, --workerList <list>:指定参与测试的 worker 范围。默认为all。选项:all: 测试所有可用的 workerjo-xxx-worker1,jo-xxx-worker2,...: 通过逗号分隔的 worker 名称列表测试特定的 worker
-o, --outputLogs <file>: 覆盖写入日志到指定文件(默认:stdout)。
burn 命令使用示例
# 使用默认设置运行所有烧机测试
atlctl burn
# 运行特定类型的 GPU 烧机测试
atlctl burn -t gemm -d 45s
atlctl burn -t transfer -d 3m
# 运行 allreduce 测试
atlctl burn -t global -d 3m -e NCCL_DEBUG=WARN
atlctl burn -t local -d 3m -e "NCCL_DEBUG=WARN;NCCL_ALGO=ring"
atlctl burn -t batch -d 3m -w jo-xxx-worker1,jo-xxx-worker2burn 命令输出示例
root@jo-da4js4klf6zknlwx-worker-0:~# atlctl burn -t global -d 45s
All workers will be checked.
Round 1: AllReduce Perf(GB/s): Size=512M, BusBW=1.34 GB/s, AlgBW=1.34 GB/s, MasterAddr=jo-da4js4klf6zknlwx-worker-0
Round 1: AllReduce Perf(GB/s): Size=1G, BusBW=1.35 GB/s, AlgBW=1.35 GB/s, MasterAddr=jo-da4js4klf6zknlwx-worker-0
Round 1: AllReduce Perf(GB/s): Size=2G, BusBW=1.35 GB/s, AlgBW=1.35 GB/s, MasterAddr=jo-da4js4klf6zknlwx-worker-0
Round 1: AllReduce Perf(GB/s): Size=4G, BusBW=1.34 GB/s, AlgBW=1.34 GB/s, MasterAddr=jo-da4js4klf6zknlwx-worker-0
Check finished.
root@jo-da4js4klf6zknlwx-worker-0:~# atlctl stop
Stopping task in all workers...
Stop job task success.
root@jo-da4js4klf6zknlwx-worker-0:~#status
atlctl status 用于查看当前任务的生命周期的状态。仅当任务处于 debugStop 状态下才能执行其他调试命令。
root@jo-daxbirgzm6e727pd-worker-0:~# atlctl status
Job status: debugStopstop
atlctl stop 停止执行训练任务代码,将任务置于 Debug 状态,可通过 atlctl status 确认执行结果。
root@jo-daxbirgzm6e727pd-worker-0:~# atlctl stop
Stopping task in all workers...
Stop job task success.重要
每次执行 atlctl run/atlctl check 命令后,也必须执行 atlctl stop 终止调试任务,否则无法再次下发检测命令。
check
atlctl run check 运行内置检测,作用于任务所有 Worker。内置检测脚本默认将对任务中的全部 Worker 进行检测 GPU 和通讯检测。
root@jo-daxbirgzm6e727pd-worker-0:~# atlctl check
All workers will be checked.
Check finished.
Check Quit.如需控制检测范围,可参考以下参数。
check 命令选项
-t, --checkType string:自定义检测范围。默认全部检测(gpu/通讯)。选项:gpu: 执行与 GPU 相关的检查。allreduce: 执行与 allreduce 操作相关的检查。all: 执行所有可用的检查。(默认值:"all")
-e, --envs string:添加自定义环境变量。默认为空。输入格式如下:key1=value1:设置单个环境变量"key2=value2;key1=value1a,value1b;...":键值对用;分隔。一个键如果有多个值,用,分割。
shell# 设置单个环境变量 atlctl check -t gpu -e tt123=123 # 设置多个环境变量 atlctl check -t gpu -e "tt123=123;tt456=456,457"-h, --help:显示check命令的帮助信息。-w, --workerList string:自定义参与检测的 worker 范围。默认为全部。选项:all: 检查所有可用的工作节点。jo-xxx-worker1,jo-xxx-worker2: 通过提供逗号分隔的工作节点名称列表来检查特定的工作节点。(默认值:"all")
-o, --outputLogs <file>: 覆盖写入日志到指定文件(默认:stdout)。
run
atlctl run [flags] <command> 下发并运行自定义调试命令。默认在所有 worker (rank) 上运行,支持按 rank 精确选择。一个 rank 通常对应训练作业中的一个进程 / Worker 实例。
run 命令选项
-r, --ranks <ranks>:指定要执行命令的 rank 列表。格式支持:all(默认):全部 rank。- 逗号分隔:
1,2,3 - 范围:
1-8 - 组合:
1,3-5,7
-f, --force:在未处于debugStop状态时仍强制下发命令(跳过停止状态检查)。通常仅在快速探测环境、无法停下主进程或紧急诊断时使用。使用后仍建议再atlctl stop以恢复一致的调试状态管理。警告
使用
--force启动的进程(未先进入debugStop)不会被后续的atlctl stop自动终止——atlctl stop只会改变任务生命周期状态,而无法回收这些“强制”启动的前台/后台进程。需要通过再次执行atlctl run下发专门的清理命令(或自行kill)来结束它们。例如:shell# 清理 residual python 进程 atlctl run "ps -ef | grep python | grep -v grep | awk '{print $2}' | xargs -r kill -9" # 或按关键字清理 sleep 进程 atlctl run "pkill -f sleep || true" atlctl stop # 清理命令执行后再 stop 重置调试状态
提示
用法建议:在调试流程中先使用 atlctl stop 进入 debugStop 状态,再执行 atlctl run。执行结束后若需要继续下发其它 run/check/burn 命令,务必再次 atlctl stop 以重置调试状态。使用 --force 可跳过状态检查,但可能导致行为与预期不一致,应谨慎使用。
run 命令用法示例
# 在全部 rank 上执行
atlctl run sleep 120

# 指定若干离散 rank
atlctl run -r 1,2,3 sleep 30

# 指定连续范围
atlctl run -r 0-7 sleep 10

# 混合选择(单个 + 范围)
atlctl run -r 0,2-4,7 env | grep NCCL

# 强制在非 debugStop 状态下执行
atlctl run -f nvidia-smi

# 强制并限制 rank
atlctl run -f -r 0,1 python /mnt/public/debug/inspect.py
执行多条 run 命令
由于 atlctl run 每次仅下发一条命令,建议:
使用 Shell 逻辑拼接:
shellatlctl run "export VAR=1 && bash step1.sh && python step2.py && echo DONE"或封装成脚本:
shellcat >/mnt/public/debug/workflow.sh <<'EOF' set -e export VAR=1 bash step1.sh python step2.py echo DONE EOF atlctl run /mnt/public/debug/workflow.sh
recover
atlctl recover:在调试结束后,恢复执行训练任务的用户代码。
hang
atlctl hang 用于手动触发任务挂起处理流程。执行此命令将清理所有运行中的任务进程,并使容错次数增加一次。
警告
- 此操作会终止所有正在运行的任务进程
- 会消耗一次容错次数(最大 10 次,可配置)
- 仅在任务处于运行状态时可用
- 执行前建议确认任务确实处于挂起状态
hang 命令选项
-y, --yes:跳过确认提示,直接执行
hang 命令用法示例
# 触发挂起处理(带确认提示)
atlctl hang

# 跳过确认直接执行
atlctl hang -y
执行效果
执行 atlctl hang 后,任务详情页的容错日志标签中会记录挂起事件:
2026-01-12 18:55:41
Command running...
2026-01-12 18:59:16
This job may have caused a hang. Relevant processes are being cleaned up. Triggered by: webterminal | Warning
日志显示:
- 挂起触发时间
- 触发来源为
webterminal(手动触发),而自动检测显示为gpuprobe - 平台会清理相关进程
根据容错功能配置,后续可能触发:
- 环境检测(如果配置了"任务 Hang"检测时机)
- 自动重启(如果配置了"任务 Hang"触发条件)
详见容错功能文档。
使用场景
- 任务确实处于挂起状态,需要手动触发容错流程
- 配合容错功能使用,触发环境检测或自动重启
- 用于测试和验证挂起检测相关的容错配置
提示
如果已开启 Hang 检测功能,平台会自动检测任务挂起状态。atlctl hang 命令主要用于手动触发或测试场景。自动检测显示触发来源为 gpuprobe,手动触发显示为 webterminal。
taint
atlctl taint 用于管理单个任务中的污点节点。可用于标记、清空和查看污点节点,便于调试和资源隔离。
注意
- 该功能需申请使用。申请通过后,可在任务详情页的规格信息表中查询节点名,作为 taint 命令输入值。
- taint 结果仅影响当前任务。
- 任务因硬件问题重新调度后,执行
atlctl taint -a list会看到平台标记的污点节点。 - 任务被「一键重跑」或「改配重跑」后,taint 结果不会保留和生效。
taint 命令选项
-a <action>:操作类型,可选值有list(查看)、set(标记)、remove(清空)。-n <nodeList>:指定节点名称,多个节点用逗号分隔,仅在set操作时使用。
taint 命令用法示例
# 查看当前所有污点节点,同时包含用户和平台添加的污点节点
atlctl taint -a list

# 标记 node1,node2 为污点节点
atlctl taint -a set -n node1,node2

# 清空所有污点节点
atlctl taint -a remove -n all

# 再次查看当前所有污点节点
atlctl taint -a list
delete
atlctl delete 用于直接删除指定的 pod,可用于强制终止异常或不需要的 pod。删除成功后,任务重启。
注意
如果在执行用户命令阶段(Job status: command)直接执行 atlctl delete,导致任务重启,平台会自动计为一次为容错。如果容错次数(最大 10 次,可配置)耗尽,任务将直接失败。为避免消耗用户任务容错次数,建议先执行 atlctl debug 命令,将任务置为 debug 状态。
delete 命令选项
-p <podList>:指定要删除的 pod 名称,多个 pod 用逗号分隔。
delete 命令用法示例
# 直接删除某个 pod
atlctl delete -p pod

# 直接删除某几个 pod
atlctl delete -p pod1,pod2

# 删除所有 pod
atlctl delete -p all
环境变量参考
以下环境变量用于控制环境检测和 atlctl 调试命令的行为。这些变量必须在创建任务时通过网页的环境变量配置区域设置。
ATLAS_BOOTCHECK_ITEMS
用于自定义环境检测的检测项目,以优化检测时间或满足特定检测需求。
适用场景
- 自动化检测:容错功能的启动检测和异常定位
- 手动调试:
atlctl check命令
可用检测项与时间开销
| 检测项 | 描述 | 预估时间开销 | 适用场景 |
|---|---|---|---|
all | 进行全部检测项,包括所有硬件和软件环境检查 | 2-4分钟 | 大规模训练、关键生产任务 |
allreduce | 进行全局 allreduce 连通性检测(不测全局速度) | 1-2分钟 | 分布式训练任务 |
gpu | 进行 gemm / transfer 以及 GPU 进程残留检测 | 1.5-3分钟 | 所有 GPU 任务 |
gpu_gemm | 仅进行 GPU gemm 计算检测 | 20-70秒 | GPU 计算性能验证 |
gpu_transfer | 仅进行 GPU 数据传输检测 | 20-80秒 | GPU 内存传输验证 |
gpu_process | 进行 GPU 进程残留检测 | 5-20秒 | GPU 进程清理验证 |
mount | 进行挂载存储读写检测 | 单个文件系统 5-30秒 | 存储 IO 验证 |
rdma | 进行 RDMA 网络检测 | 1-5秒 | 高速网络连通性验证 |
runtime | 进行运行时环境检测 | 1-5秒 | 环境验证 |
none | 不进行任何检测,直接进入用户命令执行阶段(优先级最高) | - | 跳过所有检测 |
注意
多个检测项可以合并,请用英文逗号或分号分隔,例如:gpu_gemm,gpu_transfer 或 gpu_gemm;gpu_transfer
配置方式
在创建任务的环境变量配置区域中设置:
ATLAS_BOOTCHECK_ITEMS=gpu,allreduce,rdma配置示例
# 快速启动 - 仅检查 GPU 进程残留
ATLAS_BOOTCHECK_ITEMS=gpu_process

# 平衡配置 - 检查关键项目
ATLAS_BOOTCHECK_ITEMS=gpu,allreduce,rdma

# 完整检测 - 所有项目(默认)
ATLAS_BOOTCHECK_ITEMS=all

# 跳过检测 - 不进行任何检测
ATLAS_BOOTCHECK_ITEMS=none
重要提示
重要
ATLAS_BOOTCHECK_ITEMS必须在创建任务时通过网页的环境变量配置区域设置- 在启动命令或训练脚本中设置该环境变量无效
- 任务创建后如需修改配置,请使用"改配重跑"功能
- 如果不设置此变量,系统默认执行全部检测项(等同于
all)
使用建议
| 场景 | 推荐配置 | 说明 |
|---|---|---|
| 开发调试 | gpu_process | 最小开销,快速启动 |
| 短期训练 | gpu,allreduce | 平衡性能和保护 |
| 长期训练 | all | 完整检测,最大保护 |
| 性能测试 | none | 跳过检测,测量纯任务性能 |
ATLAS_ACTIVATE_ENV
用于为环境检测和调试命令激活虚拟环境,避免 pytorch not found 等错误导致检测无法正常进行。
适用场景
- 自动化检测:容错功能的启动检测和异常定位阶段
- 手动调试:
atlctl check和atlctl burn命令
注意
此环境变量不影响用户训练代码的执行环境。用户代码仍使用任务启动命令中指定的环境。
配置方式
在创建任务的环境变量配置区域中设置:
ATLAS_ACTIVATE_ENV=source /usr/local/miniconda3/etc/profile.d/conda.sh;conda activate myenv配置示例
# Conda 虚拟环境
ATLAS_ACTIVATE_ENV=source /usr/local/miniconda3/etc/profile.d/conda.sh;conda activate myenv

# Python venv
ATLAS_ACTIVATE_ENV=source /root/project-a/.venv/bin/activate

# 使用 . 命令(等同于 source)
ATLAS_ACTIVATE_ENV=. /usr/local/miniconda3/etc/profile.d/conda.sh;conda activate myenv

# 相对路径 venv
ATLAS_ACTIVATE_ENV=. .venv/bin/activate
为什么需要此配置
环境检测和调试命令需要访问 PyTorch、NCCL 等库来执行硬件检测。如果这些库安装在虚拟环境中,必须先激活虚拟环境。
典型错误(未配置时):
ModuleNotFoundError: No module named 'torch'解决方案:
设置 ATLAS_ACTIVATE_ENV 激活包含 PyTorch 的虚拟环境。
验证配置效果
配置后,可在任务的容错日志中查看环境检测输出,确认 PyTorch 等库被正确识别:
[Runtime Check] PyTorch: v2.3.0a0+40ec155e58.nv24.03; CUDA: 12.4; NCCL: (2, 20, 5).重要提示
重要
ATLAS_ACTIVATE_ENV必须在创建任务时通过网页的环境变量配置区域设置- 在启动命令或训练脚本中设置该环境变量无效
- 任务创建后如需修改配置,请使用"改配重跑"功能
- 环境激活命令必须使用
source或.命令
作用范围对比
| 场景 | ATLAS_ACTIVATE_ENV | 任务启动命令 |
|---|---|---|
| 容错启动检测 | 生效 | 不生效 |
| 容错异常定位 | 生效 | 不生效 |
| atlctl check | 生效 | 不生效 |
| atlctl burn | 生效 | 不生效 |
| 用户训练代码 | 不生效 | 生效 |
常见问题
atlctl 命令会消耗用户任务容错次数吗?
atlctl stop/run/recover命令不会消耗用户任务容错次数。- 先执行
atlctl debug再执行atlctl delete,也不会消耗用户任务容错次数。
为什么 atlctl taint -a list 输出了用户未标记的污点节点?
任务因硬件问题重新调度后,执行 atlctl taint -a list 会看到平台标记的污点节点。
为什么执行 atlctl delete 后,任务直接运行失败了?
如果在执行用户命令阶段(Job status: command)直接执行 atlctl delete,导致任务重启,平台会自动计为一次为容错。如果容错次数(最大 10 次,可配置)耗尽,任务将直接失败。
为避免消耗用户任务容错次数,建议先执行 atlctl debug 命令,将任务置为 debug 状态,然后再执行 atlctl delete 命令。
在调试过程中,如何在任务 Worker 容器中运行一个分布式脚本?
您可以在任务运行中,登入任意任务 Worker,使用 atlctl run "<command>" 下发并运行自定义调试脚本,该调试脚本将在任务所有 Worker 上运行。
为什么执行 atlctl run 后无法再次下发其他命令?
每次执行 atlctl run 或 atlctl check 等部分命令后,都必须执行 atlctl stop 来终止当前的调试任务。这是因为 atlctl 工具需要确保任务处于正确的调试状态才能接受新的命令。
如何查看烧机测试的详细输出结果?
执行 atlctl burn 命令时,测试结果会直接显示在终端输出中。对于通信测试,您可以通过设置环境变量 -e NCCL_DEBUG=WARN 来获取更详细的调试信息。
任务恢复后是否会从断点继续执行?
使用 atlctl recover 恢复的任务会重新开始执行用户代码,而不是从调试前的断点继续。因此建议在调试前确保训练代码具有合适的检查点保存机制。
可以在多个 Worker 上同时登录并执行 atlctl 命令吗?
不建议在多个 Worker 上同时执行 atlctl 命令,这可能导致冲突。建议只在一个 Worker 上执行 atlctl 命令,该命令会自动作用于所有相关的 Worker。
使用 atlctl run --force 后为什么 atlctl stop 不能终止进程?如何清理?
--force 会跳过任务是否处于 debugStop 的检查,直接在当前生命周期阶段启动进程。这些被“强制”拉起的进程不受 atlctl stop 生命周期控制,atlctl stop 只会改变任务状态,不会自动回收这些进程。
清理方式:再次使用 atlctl run 下发清理命令(或显式 kill),然后再执行一次 atlctl stop 重置调试状态。
示例:
# 清理遗留 python 进程
atlctl run "ps -ef | grep python | grep -v grep | awk '{print $2}' | xargs -r kill -9"
atlctl stop

# 如果只是一个 sleep / 自定义脚本残留
atlctl run "pkill -f sleep || true"
atlctl stop
最佳实践:除紧急诊断外尽量避免使用 --force;常规调试流程应先 atlctl stop(进入 debugStop)再运行调试命令,结束后再 atlctl stop,保持状态一致性。
如何只在部分 rank/worker 上执行调试命令?
使用 atlctl run -r 精确选择目标 rank(支持逗号、范围与混合):
atlctl run -r 0,2-4,7 /mnt/public/debug/test.sh更多用法参见上文执行自定义调试命令和 atlctl run。
怎么在分布式训练任务中进行调试?
简要流程:
- 进入任务详情页,登录任意 Worker 的 Web Terminal。
- 执行
atlctl stop,确保处于debugStop状态。 - 选择一种调试方式并执行:
- “执行内置检测脚本”:
atlctl check - “执行自定义调试命令”:
atlctl run [-r <ranks>] <command> - “执行 GPU 和通信烧机测试”:
atlctl burn ...
- “执行内置检测脚本”:
- 每次调试命令后都执行
atlctl stop复位;调试结束,执行atlctl recover恢复训练。
示例(最小闭环):
atlctl stop && atlctl run "nvidia-smi" && atlctl stop && atlctl recoverATLAS_BOOTCHECK_ITEMS 在哪些场景下生效?
ATLAS_BOOTCHECK_ITEMS 影响以下场景的检测项:
自动化环境检测(容错功能):
- 任务启动时的启动检测
- 任务失败后的异常定位
- 任务 Hang 时的检测
手动调试(atlctl 工具):
atlctl check命令
如需了解自动化环境检测的配置,请参阅容错功能文档。
为什么设置了 ATLAS_ACTIVATE_ENV 但环境检测仍然报错?
请检查以下几点:
- 设置位置:必须在创建任务页面的"环境变量"字段设置,不能在启动命令或脚本中设置
- 命令语法:必须使用
source或.命令,例如:ATLAS_ACTIVATE_ENV=source /path/to/activate - 路径正确性:确认虚拟环境路径在容器中存在
- 虚拟环境内容:确认虚拟环境中已安装 PyTorch 等必需库
可在任务的容错日志中查看环境检测输出以诊断问题。
自动化环境检测和 atlctl check 有什么区别?
| 特性 | 自动化环境检测 | atlctl check |
|---|---|---|
| 触发方式 | 平台自动(基于配置) | 用户手动执行 |
| 配置位置 | 创建任务时的容错配置 | 登录 Worker 后执行 |
| 运行时机 | 任务运行前/失败/Hang | 用户决定 |
| 检测项控制 | ATLAS_BOOTCHECK_ITEMS | -t 命令参数 + ATLAS_BOOTCHECK_ITEMS |
| 用途 | 自动预防和诊断 | 手动调试和诊断 |
两者互补:自动化检测提供持续保护,atlctl check 提供灵活的手动诊断能力。